How To Compress Video On Mac – Easy Ways
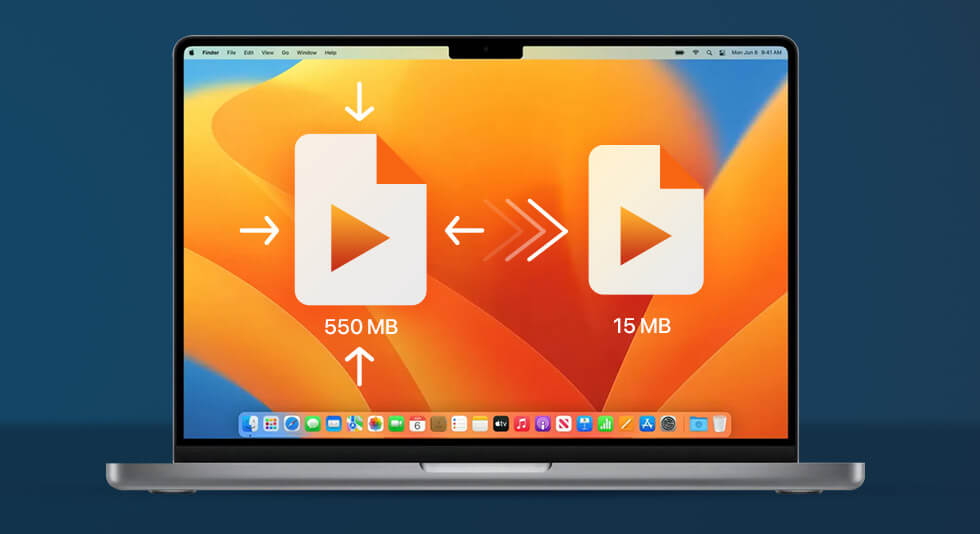
A large high-resolution video file doesn’t just occupy tons of storage space on your Mac but is even difficult to move or share. That’s where the knowledge of compressing Mac videos can prove helpful. It is an art used to make videos smaller, something that can make two hours of video weight under GB.
So how do you compress videos on Mac? That’s what this post is all about. Here we’ll discuss some effective ways to compress videos on Mac.
What Are The Various Ways To Compress Videos On Mac?
Method 1: Compress Video On Mac Using A Video Compressor for Mac
One of the best ways to reduce video file size is to use a video compressor for Mac. You can check out our post on some of the best video compressors for Mac and why you should use one. Movavi Video Converter, for instance, is one of the best utilities using which you can compress a video file on a Mac. To reduce video size on Mac –
Click Here to Install Movavi Video Converter
1. Drag and drop media in the video converter.
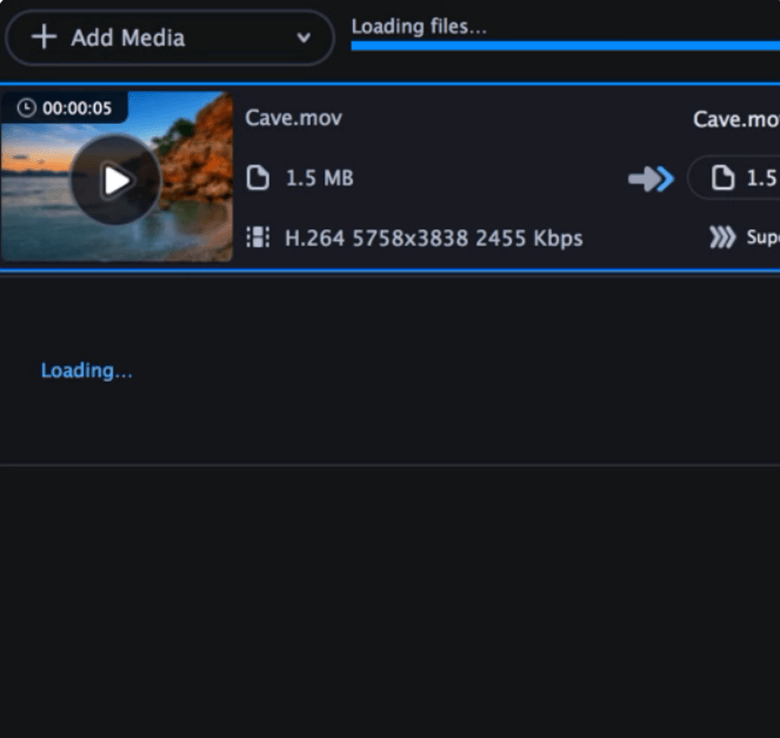
2. Click on the file size value and change the other settings per your need.
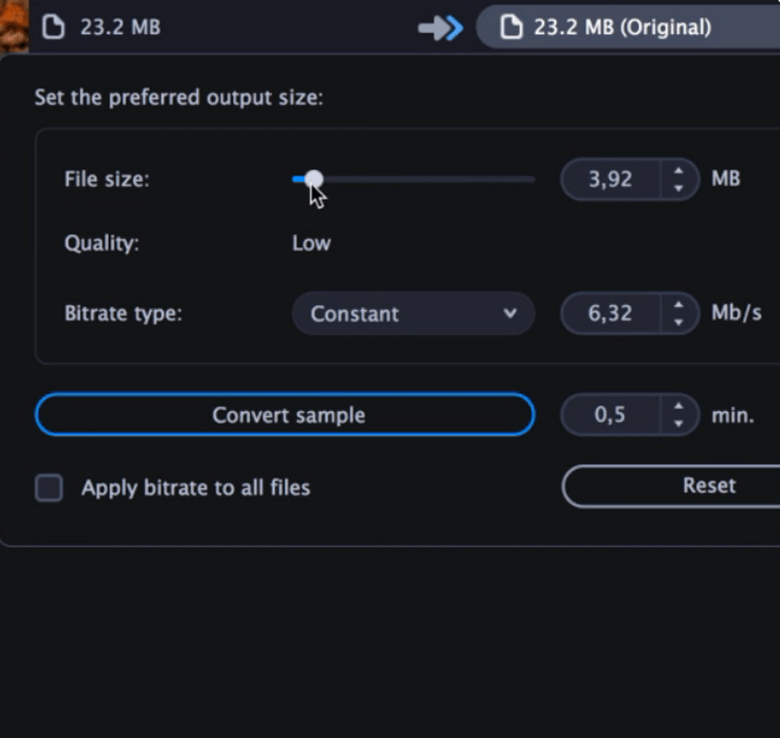
3. Click on Convert and save the file to the desired location on your Mac
Method 2: Use Quick Time Player To Compress Video On Mac.
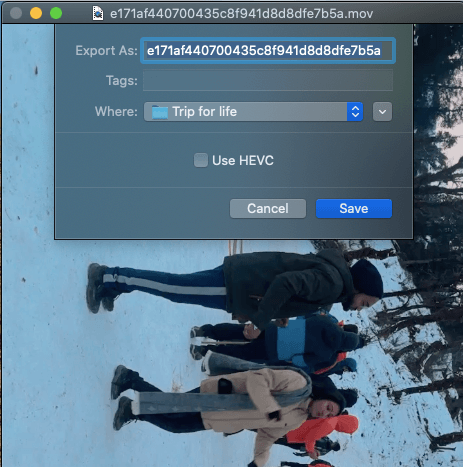
Quicktime Player is a default app that comes preinstalled on your Mac. While most users use Quicktime player only as a means to playback videos on Mac, not many users know that you can compress a video on a Mac with the help of Quicktime player. To compress a video on Mac using Quicktime player –
1. Once you have opened the Quicktime player, select the video you want to compress.
2. Click on File> Export As
3. From the list of resolutions available, select the lowest resolution.
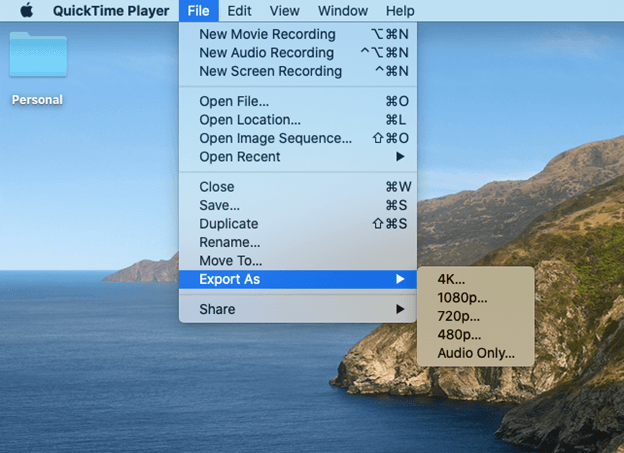
4. Rename your video and choose a location where you want to save the video.
Method 3: Compress Video On Mac With iMovie
To compress a video on Mac, you can use iMovie, a video editing application that comes preinstalled on your Mac. However, if you don’t find it on your Mac, you can install the same from the App Store. Here are the steps to compress a video on Mac using iMovie –
1. After opening iMovie, click on Create New and then click on Movie.
2. Click on File > Import and select the video files you want to compress.
3. Drag the desired videos into the timeline.
4. Next, click on File > Share> File.
5. Select Export settings
6. Tweak the resolution and quality. This will have an impact on the file size
7. You can click on the dropdown next to Compress and click on Faster.
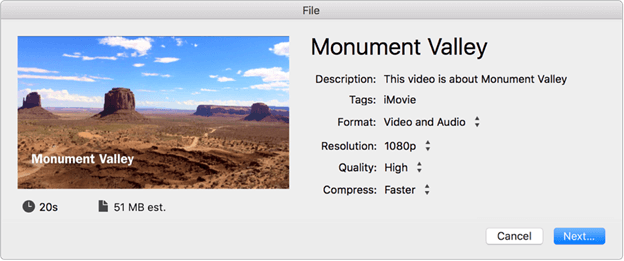
8. Click on the Next button.
9. Rename your video and choose the location where you want to save the video after you have compressed it.
10. Click on Save.
How Does Video Compression Work?
Video compression works almost on the same lines as optimizing photos. However, the difference here is that you optimize several pictures simultaneously (video being a sequence of many images).
Regarding video compression or reducing the video file size, there are three aspects – resolution, bitrate, and encoding. Talking of resolution, one that matches your screen size is apt. A resolution of 1080 p or 1920 X 1080 is apt. However, for 4K, you can go up to 3840 X 2160.
Next up is Bitrate. For all practical purposes, you can choose 8 Mbps for an HD video and 35 to 45 Mbps for a 4K video. Last, you can select H.264 encoding and MP4 encoder.
Does Video Compression Reduce Video Quality?
Technically, yes! Whenever you compress a video on Mac, there is a quality loss, but because smartphones and cameras deliver high quality, there is no visible loss in quality. And, provided you use the right settings, you shouldn’t notice video quality loss.
Wrapping Up
As you can infer from the ways above, you don’t have to be an expert to compress videos on Mac. To be able to compress videos better on Mac, you can always take the help of a video compression tool like Movavi Video Converter. Found value in what you read? Give this post a thumbs up and share it with other Mac users. For more such information, keep reading BestMacCleaner.
 10 Best Video Player for Mac in 2024
 15 Best Video Converter For Mac in 2024
 How to Remove Background Noise from Video on Mac