How To Sign A PDF on Mac Quickly (4 Methods)
Thanks to the advancements in technology, the cumbersome process of printing, signing, and scanning documents is finally left behind. Whether you’re a busy professional, a student, or simply someone dealing with paperwork on a regular basis, mastering the art of signing PDFs on your Mac can be a game-changer.
Luckily, Apple understands the modern needs of its users and has equipped macOS with intuitive built-in tools that simplify the entire PDF signing process. In this guide, we’ll explore four different approaches to sign a PDF on Mac that will allow you to be more productive.
So, yes, it’s time to say goodbye to unnecessary stress and embrace the flexibility and convenience of signing your documents with just a few clicks. Get ready to revolutionize your workflow and unlock the full potential of PDF signatures on your Mac.
Let’s dive in!
How to Sign a PDF on Mac (4 Methods)
Method 1: Use the Preview App
The Preview app on your Mac is a versatile tool that goes beyond simple image and PDF viewing. It provides an intuitive and efficient method for signing your PDF documents. Here’s a step-by-step guide on how to utilize the Preview app to add your signature:
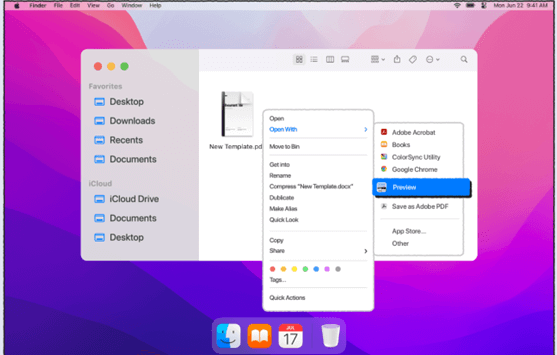
Step 1: Begin by opening the PDF file you wish to sign using the Preview app. You can do this by double-clicking on the PDF, and it will automatically open in Preview.
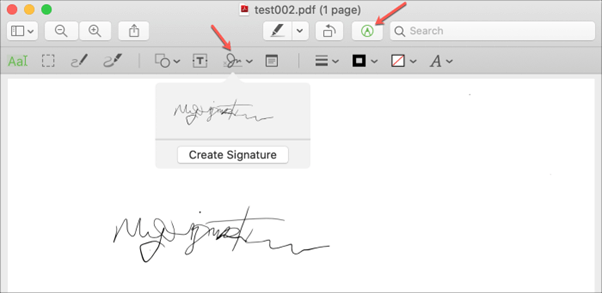
Step 2: Once the PDF is open, locate the “Markup Toolbar” icon in the top-right corner of the Preview window. It resembles a pencil tip inside a circle. Click on it to access the Markup Toolbar.
Step3: Within the Markup Toolbar, find the “Sign” button. It appears as a fountain pen. Clicking on it will prompt a dropdown menu that provides signature options.
Step 4: If you already have a signature saved, you can select it from the dropdown menu. However, if you don’t, choose the “Create Signature” option to add signature to PDF on Mac.
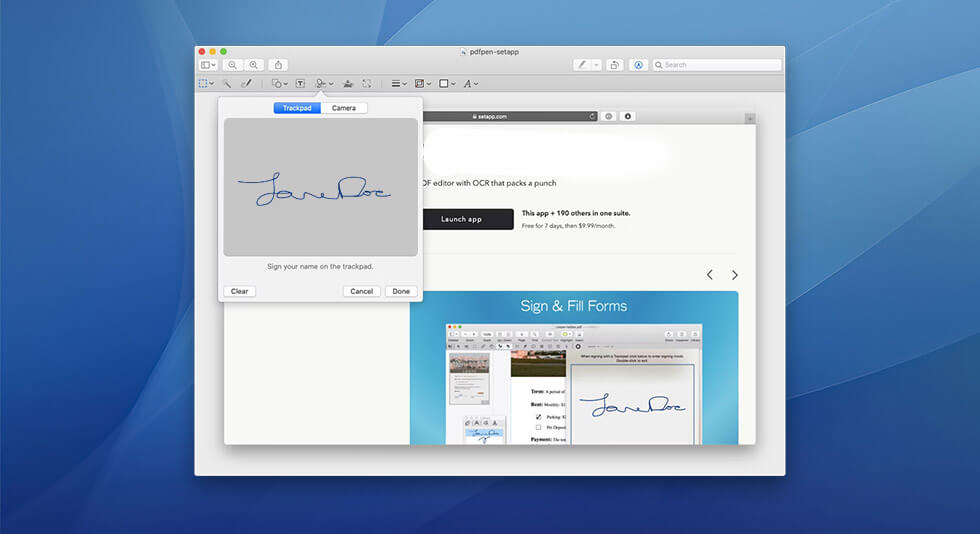
Step 5: Upon selecting “Create Signature,” a signature creation window will appear. You have two options: signing directly using your Mac’s trackpad or using a piece of paper and your Mac’s camera to capture your handwritten signature.
Step6: Once you have signed, click “Done” to save your signature.
Step 7: Returning to the dropdown menu in the Markup Toolbar, select the signature you just created. Position it precisely where you want it to appear on the PDF by clicking to place it.
Step8: To make adjustments to the size or orientation of the signature, simply click and drag the corners of the signature box.
Step 9: After finalizing the placement, navigate to the “File” option in the top menu and click “Save” to save the signed PDF, complete with your signature. And that’s it!
Using the Preview app is a straightforward and efficient way to sign PDFs on your Mac. By employing this built-in tool, you eliminate the need for third-party applications while ensuring that your documents remain secure and maintain a professional appearance. The Preview app simplifies your document signing process, allowing you to handle PDF signatures seamlessly on your Mac.
Also read: How to Convert PDF to Word on Mac
Method 2: Sign a PDF on Mac Using Trackpad
If you prefer a more interactive signing experience, you can sign a PDF on your Mac using the trackpad. Here’s a simplified step-by-step guide:
Step 1: Open the PDF file you wish to sign using the Preview app on your Mac.
Step2: Access the Markup Toolbar by clicking on the designated icon in the top-right corner of the Preview window.
Step 3: In the Markup Toolbar, choose the “Sign” option, and from the dropdown menu, select “Trackpad.”
Step4: Click on the signature box where you want your signature to appear on the PDF.
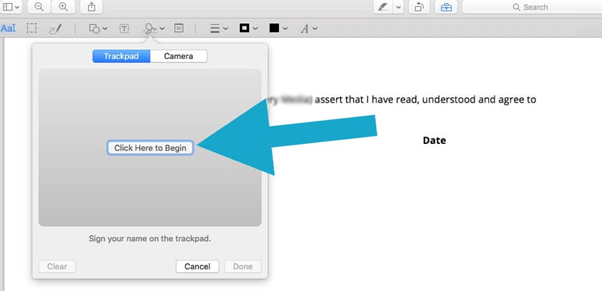
Step 5: Use your finger to write your signature directly on your Mac’s trackpad. For trackpads with force touch capabilities, pressing down harder will create a bolder ink effect.
Step6: Click “Done” to save your signature once you’ve finished. If you’re unsatisfied with your signature, you can click “Clear” and start again.
By following these simple steps, you can conveniently sign your PDF documents using the trackpad on your Mac. Enjoy the interactive signing process and add your personal touch to your digital files effortlessly.
Also read: Best PDF Password Remover for Mac
Method 3: Use your Mac’s Camera
Yes, that’s right. You can also use your device’s camera to sign a PDF on Mac. Signing a PDF on your Mac using the built-in camera is a straightforward process. Follow these steps:
Step 1: Open the PDF file you wish to sign using the Preview app on your Mac.
Step2: Locate and click on the camera icon within the Markup Toolbar.
Step 3: Take a piece of white paper and write your signature on it using a pen.
Step4: Hold the paper up to your Mac’s camera, ensuring that your signature aligns with the blue line displayed on the screen.
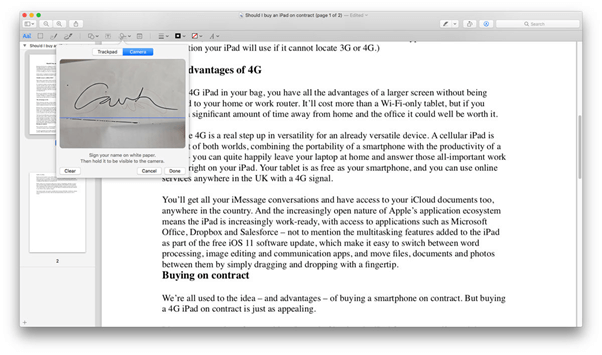
Step 5: As the camera detects your signature, it will appear in the window on your screen.
Step6: If you are satisfied with the captured signature, click “Done” to save it. However, if you are not pleased with the result, click “Clear” to start the process again.
By following these steps, you can easily sign PDF documents using your Mac’s camera. This method provides a convenient and efficient way to add your signature digitally, allowing you to complete your paperwork swiftly and seamlessly.
Method 4: Sign a PDF on Mac With Wondershare PDFelement
If you’re looking for a comprehensive and feature-rich solution to sign PDFs on your Mac, Wondershare PDFelement is a reliable third-party application that offers a wide range of editing and signing capabilities. Here’s how you can sign a PDF using Wondershare PDFelement:

Step 1: Visit this link and start by downloading and installing Wondershare PDFelement on your Mac. Launch the application once it’s installed.
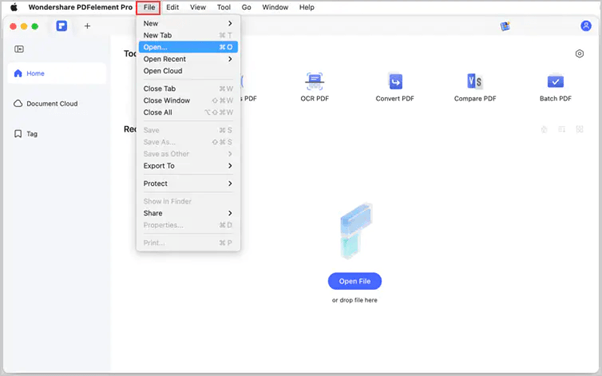
Step2: Open the PDF document you want to sign within Wondershare PDFelement by clicking on the “Open File” button or dragging the file directly into the application.
Step 3: Once the PDF is open, click on the “Markup” tab located at the top of the interface.
Step4: Within the Markup tab, select the “Sign” option. A drop-down menu will appear with different signing options.

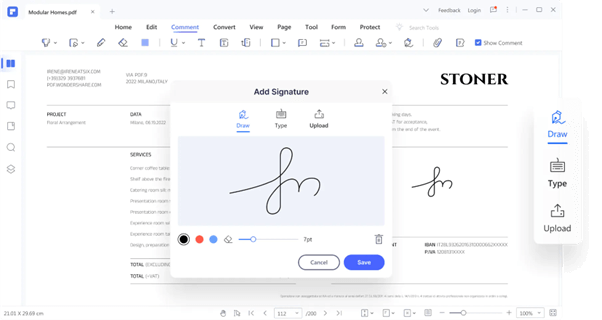
Step 5: Choose the preferred method for adding your signature. You can either create a new signature, import a scanned signature, or use a digital certificate if applicable.
Step6: If you choose to create a new signature, you can either type your name and select a font style, or you can draw your signature using the mouse or trackpad.
Step 7: After creating or selecting your signature, position it on the PDF document where you want it to appear. You can resize and adjust the signature as needed.
Step8: Once your signature is in place, save the signed PDF file by clicking on the “File” menu and selecting “Save” or “Save As” to specify a new file name or location.
Wondershare PDFelement offers a comprehensive set of tools for PDF editing and signing on your Mac. With its user-friendly interface and various signing options, you can sign PDF documents effortlessly while enjoying additional features for a seamless document management experience.
Conclusion
This wraps up our guide on how to sign a PDF on Mac using different methods. By mastering these methods, you can save time and streamline your document signing process, eliminating the need for printing, signing, and scanning. Whether you choose the simplicity of the Preview app or the robust features of Wondershare PDFelement, you have the flexibility to add your signature digitally with just a few clicks.
Now, armed with these efficient signing methods, you can confidently handle PDF documents on your Mac, enhancing your productivity and reducing paper waste.
So, which method would you prefer to add signature to PDF on Mac? Feel free to share your thoughts in the comments section.
 How to Reduce PDF File Size on Mac
 Top 10 Best PDF to Word Converter For Mac in 2024(Free and Paid)
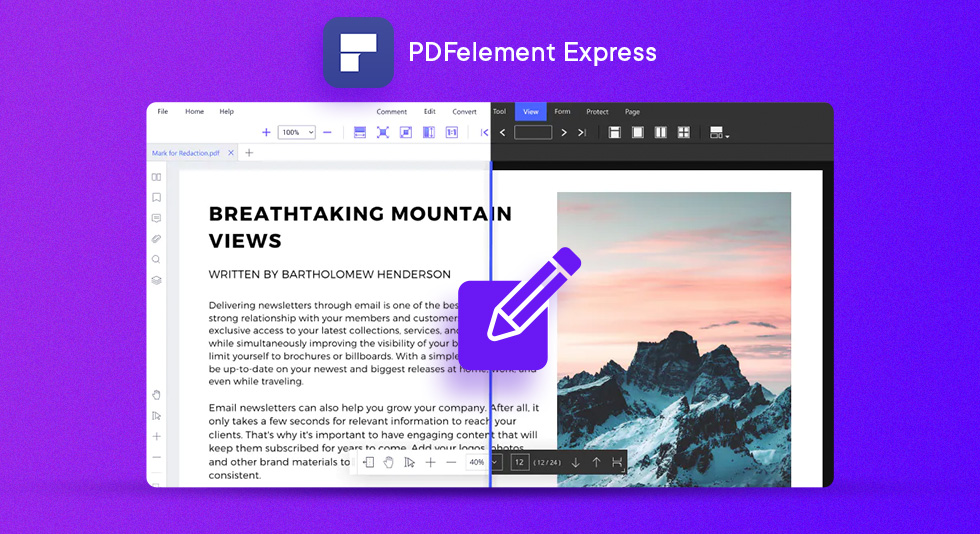 PDFelement Express For Mac Review | All-in-one PDF Editor Software