How to Recover Data from External Hard Drive on Mac?
,External hard drives offer a convenient way for Mac users to store large amounts of data, including photos, audio, videos, and documents. These devices can be easily connected to a Mac via USB or Thunderbolt and can be used to store files and backups of important data.
While external hard drives are generally reliable, sometimes they can fail or become inaccessible due to various reasons, such as physical damage, logical errors or bugs, accidental deletion and virus attacks. Losing data can be a frustrating and stressful experience, especially if you don’t have a backup of your files.
Fortunately, there are ways to recover lost data from an external hard drive on a Mac. The process involves several steps and may require the use of specialized software or the help of a data recovery expert. In this blog, we’ll discuss the steps you can take to recover data from an external hard drive on a Mac using different methods.
1: Retrieve Lost Data From the Trash
2: Use the Time Machine Backup
3: Repair the External Hard Drive Using Disk Utility
4: Download and Install EaseUS Data Recovery Tool
Let’s explore and gain some in-depth knowledge on external hard drive recovery on macOS.
How to Recover Data from External Hard Drive on Mac?
Method 1: Retrieve Lost Data From the Trash
When you connect your external drive to your Mac, you may notice that the Trash bin for the external drive appears alongside the main disk’s bin in the Dock. To recover deleted files from both drives, simply open the Trash folder on your Mac and locate the files you want to restore.
Follow these simple steps to recover your lost data from the Trash on your external hard drive:
- Connect your external hard drive to your Mac and open the Trash by clicking on its icon placed in the Dock.
- Search for the file you want to recover in the Trash.
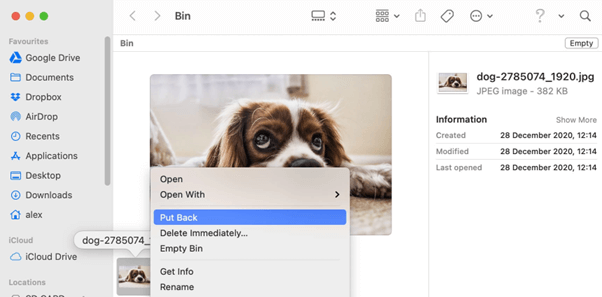
- Right-click on the file and select the “Put Back” option to restore it to its original location on the external or internal drive.
Method 2: Use the Time Machine Backup
As we are all aware, an external hard drive plays a crucial role in taking Time Machine backups on Mac to store our data. Well, you have the option to set up Time Machine to back up both your Mac’s primary drive and any external drives connected to your computer at the time of the backup. But mostly removable storage devices such as external hard drives are used for most Time Machine backups.
To recover data from external hard drive using Time Machine backup, first, connect both drives to your device. Also, it’s important to ensure that both drives have the same physical configuration. Before you begin backing up or recovering the external drive, you must remove it from Time Machine’s list of excluded items. Here are the steps to follow.
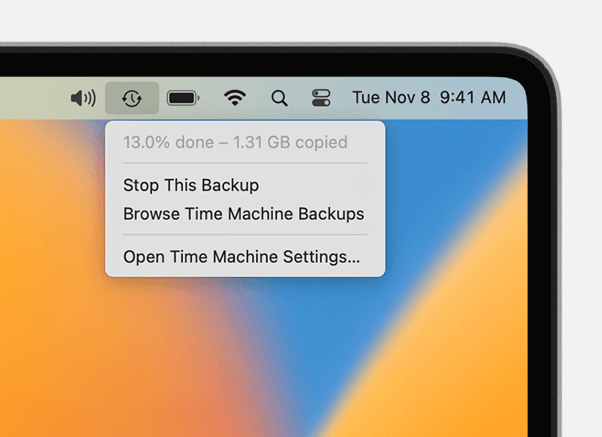
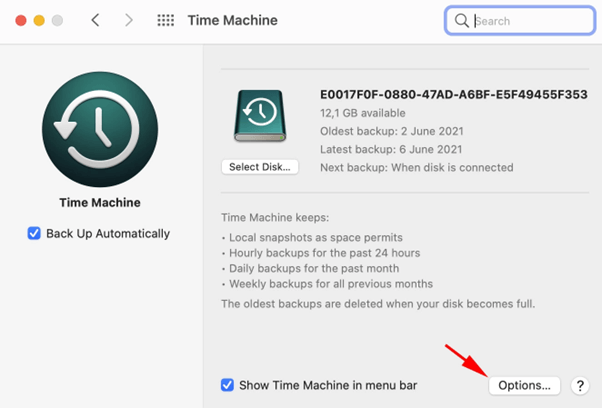
- Connect the external drive that you need to back up your Mac. Tap on the “Time Machine” icon to get started. Select “Open Time Machine Preferences”.
- A new window will now appear on the screen. Tap on the “Options” button placed at the bottom-right corner.
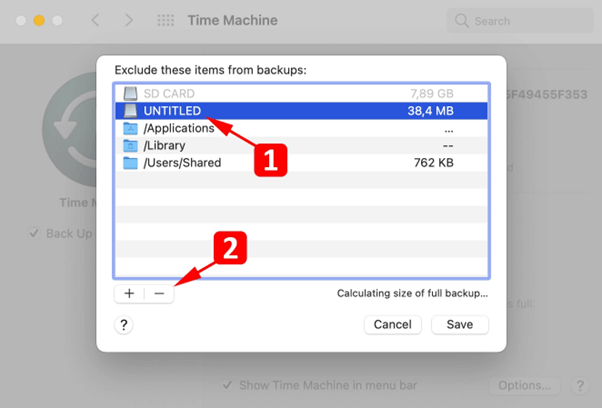
- Remove the external drive from the “Exclusions” list. Hit on the “Save” button when done.
So, now begins the external hard drive recovery process.
Step 1: Make sure that the external drive remains connected to your Mac. Then, connect the storage device that holds your Time Machine backup files to your computer.
Step 2: Next, open a Finder window in the folder on the external hard drive where the file you wish to recover was previously stored.
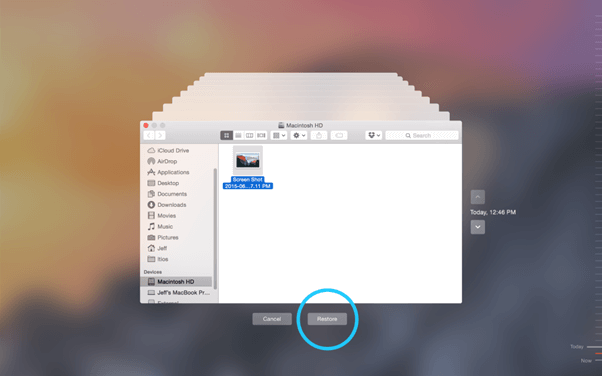
Step 3: To launch Time Machine, click on the Time Machine icon on the menu bar. You can then use the timeline and arrows to search through the available backups and find the file or files you want to recover.
Step 4: After selecting the items you want to retrieve, click the Restore button, and the items will be restored to their original location on the external hard drive.
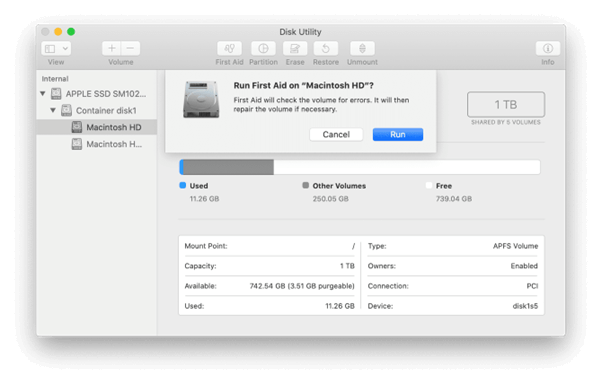
Method 3: Repair the External Hard Drive Using Disk Utility
Here are the steps to repair an external hard drive with Disk Utility on a Mac:
- Connect the external hard drive to your Mac.
- Open Disk Utility. You can find it in the Utilities folder under the Applications folder, or by searching for it in Spotlight.

- In the Disk Utility window, select your external hard drive from the list of available drives in the left-hand sidebar.
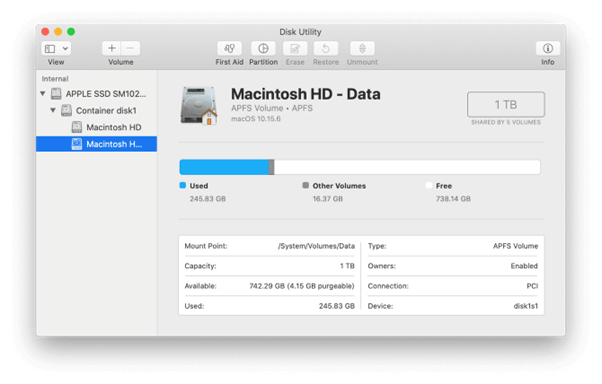
- Click the “First Aid” button in the top toolbar.
- Disk Utility will perform a check on the selected drive and repair any errors it finds.
- If Disk Utility is unable to repair the drive, you may need to erase and reformat it. To do this, select the external hard drive in Disk Utility and click the “Erase” button in the top toolbar. Choose a new format (such as Mac OS Extended or APFS), then click “Erase” to begin the process.
Well, Disk Utility is pretty helpful. But if the external hard drive is physically damaged, Disk Utility may not be able to repair it. In that case, you may need to take it to a professional data recovery service for further assistance.
Also read: How To Transfer Files From Mac to Mac
Method 4: Download and Install EaseUS Data Recovery Tool
Yes, you can also use a professional data recovery tool on your Mac to recover data from external hard drive in just a few quick steps. Download and install the EaseUS data recovery tool on your device to recover lost or deleted data from a Mac computer, including documents, photos, videos, audio files, and more.
Here are the steps to use EaseUS Data Recovery Wizard for Mac:
1. Download and install EaseUS Data Recovery for Mac from the developer’s website.
2. Open the software and select the drive or location where you lost your data.
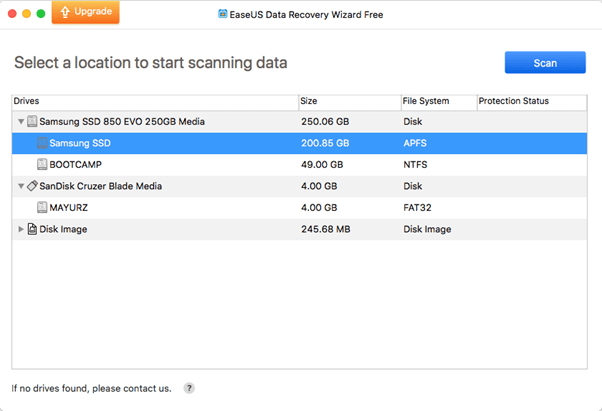
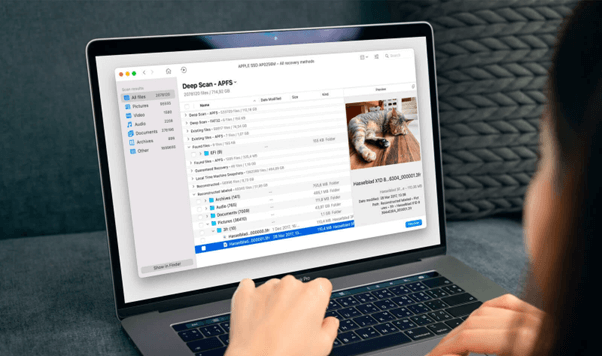
3. Click the “Scan” button to start the scan process. The software will scan the selected drive or location for any recoverable data.

4. Once the scan is complete, the tool will display a list of all the recoverable files. You can preview the files by clicking on them and selecting the preview option.
5. Select the files you want to recover and choose a new location on your Mac’s hard drive to save the recovered files. Do not save them back onto the same drive, as this may overwrite the lost data.
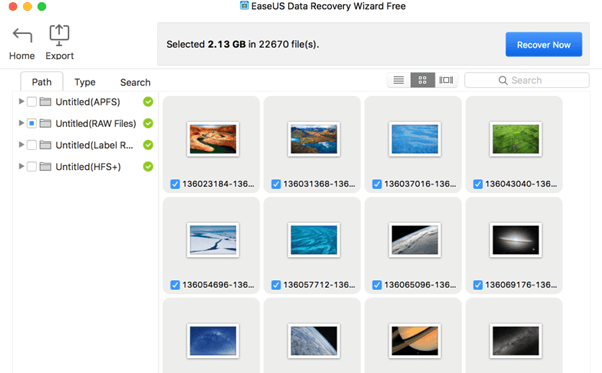
6. Click the “Recover” button to recover the selected files. EaseUS Data Recovery Wizard for Mac will save the files to the specified location.
Once the recovery process is complete, you can safely disconnect the external hard drive from your Mac.
Conclusion
This wraps up our post on how to recover data from external hard drive on Mac. Losing data from an external hard drive can be a frustrating experience, but thankfully there are several methods you can use to recover your important files on a Mac.
Whether you choose to use the built-in Disk Utility tool or third-party data recovery software like EaseUS Data Recovery Wizard, it’s important to act quickly and avoid using the affected drive until the recovery process is complete. By following the steps outlined in this guide, you can increase your chances of successfully recovering your lost data from an external hard drive on a Mac.
Was this post helpful? Feel free to share your thoughts in the comments box!
 How To Start and Use Mac In Recovery Mode?
 Best Mac Hard Drive Clone Software In 2024
 How to Recover Deleted Data Files on Mac
 How to Fix “Read Only” External Drive Problems on Your Mac