How to Recover Unsaved Word Document on Mac
Accidentally deleting a file can be a frustrating experience, and it’s not uncommon to accidentally delete a Word document on your Mac. But before you start to panic, there are a few steps you can take to recover the file. Are you looking for effective ways to recover unsaved Word documents on Mac? You’ve come to the right place.
Microsoft Word for Mac has some unique features such as AutoRecovery and Temporary folders where unsaved items may be stored. Additionally, you can check the Trash folder for any recovered items.
In this post, we have listed a comprehensive guide on how to recover Word documents on macOS using different methods in just a few simple steps.
Let’s get started.
Also read: Best PDF to Word Converter For Mac
How to Recover a Word Document on Mac?
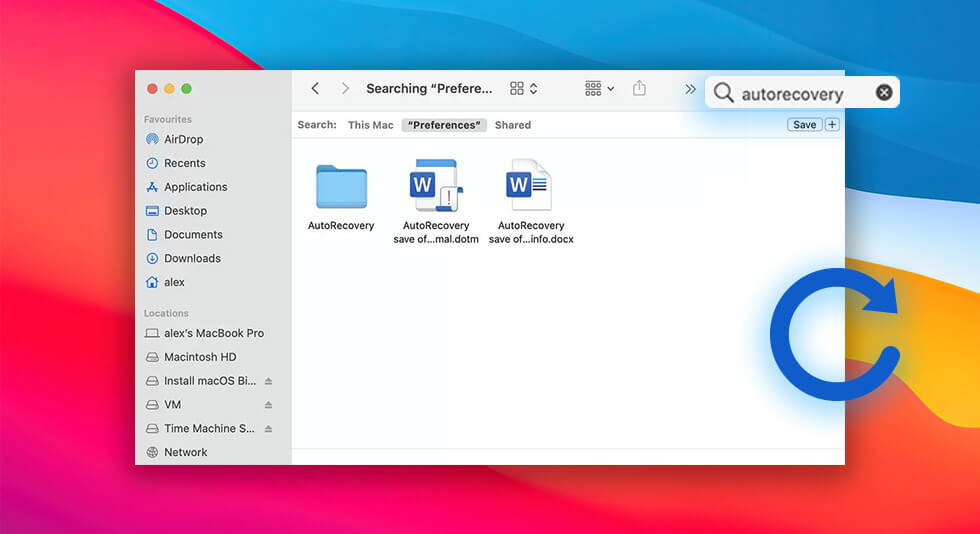
Method 1: Via AutoRecovery
Fortunately, Microsoft Word for Mac has a feature called AutoRecovery that can help you recover unsaved documents. AutoRecovery is a valuable feature in Microsoft Word for Mac that can save you from losing important work. By enabling this feature and knowing how to use it, you can have peace of mind knowing that your work is always being saved.
To recover an unsaved Word document on your Mac, you can follow these steps:
Step 1: Open the “Finder” application on your Mac and head to Go> Go To.
Step 2: In the “Go to Folder” window, type the following path:
~/Library/Containers/com.microsoft.Word/Data/Library/Preferences/AutoRecovery
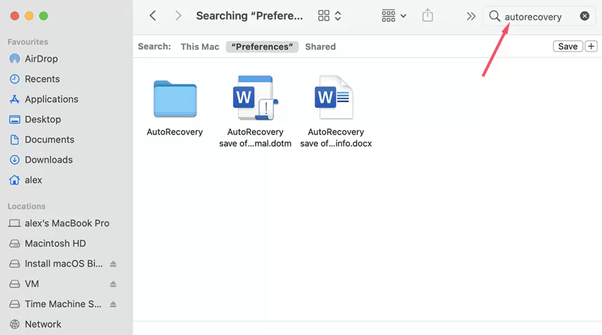
Step 3: Click the “Go” button to open the folder.
Step 4: Double-click on the file that has the same name as your unsaved Word document.
Step 5: The file will open in Word for Mac. Click on the “File” menu and select “Save As”.
Step 6: Type a new name for the file in the “Name” field, select a folder to save the file, and click the “Save” button.
Once you follow these steps, you can recover your unsaved Word document on your Mac using the AutoRecovery folder. Remember to save the recovered file with a new name to avoid overwriting the original unsaved document.
Also read: How To Password Protect Folder on Mac
Method 2: Recover Word Document From the TMP Folder
Microsoft Word for Mac automatically saves a copy of the unsaved document as a Word Work File in the Temporary folder. However, locating this folder can be a challenge for some Mac users, as it is not easily accessible. Follow these quick steps to recover an unsaved Word document on Mac by accessing the temporary folder.
Step 1: Launch the “Terminal” application by navigating to “Applications” > “Utilities” and double-clicking on “Terminal”.
Step 2: In the Terminal window, type “open $TMPDIR” and press enter. This will take you to the TMP folder where temporary files are stored.
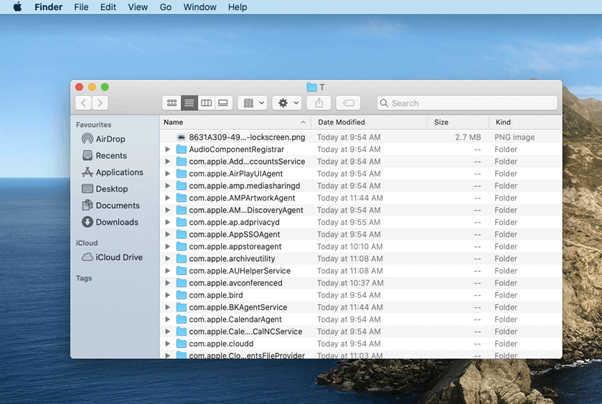
Step 3: Locate and open the folder called “Temporary Items” in the TMP folder. Here, you’ll find the desired unsaved Word files. Right-click on the file and select “Open with…” and choose Microsoft Word.
Step 4: Once the document is opened, click on “File” > “Save As” and save it to a different location to ensure it’s not overwritten.
By following these steps, you can recover your unsaved Word documents on your Mac from the Temporary Items folder.
Method 3: Use the Recovered Items Folder
If you’re unable to find your unsaved Word document in the Auto Recovery or Temporary folder on your Mac, or in the Recovered Items folder, you may be able to recover it from the Trash Bin. Here’s how:
Step 1: Open the Trash Bin on your Mac by clicking on the Trash Bin icon in the Dock.
Step 2: In the Trash Bin, look for the “Recovered Items” folder.
Step 3: If you find the “Recovered Items” folder, open it and look for the Word document you want to recover.
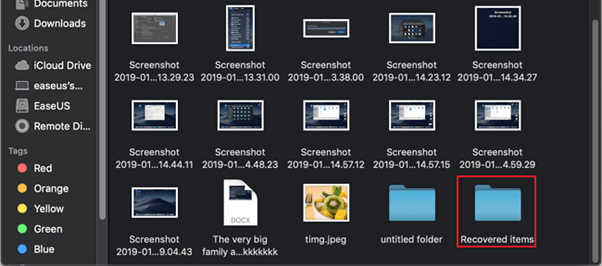
Step 4: Once you’ve found the document, right-click on it and select “Put Back”. This will restore the document to its original location on your Mac.
If the “Recovered Items” folder is not in the Trash Bin, it means it may have been automatically deleted.
Method 4: Use a Third-Party Data Recovery Software
Yes, it’s possible to recover unsaved Word documents on Mac using third-party data recovery tools. There are several data recovery software options available online that can help you recover your unsaved Word documents.
Here are the steps you can follow to recover unsaved Word documents on a Mac using a third-party data recovery tool:
Step 1: Download and install a reliable third-party data recovery tool on your Mac. You can find several options available online, including EaseUS Data Recovery Wizard, Disk Drill, or Stellar Data Recovery.
Step 2: Launch the data recovery tool and select the drive where the unsaved Word document was stored. You can select the drive from the list of available drives or volumes displayed on the tool’s interface.
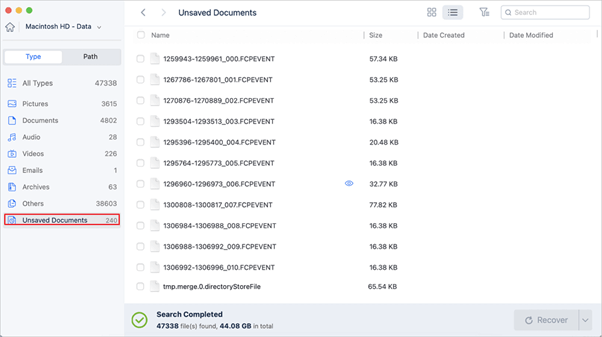
Step 3: Run a deep scan on the selected drive to search for any recoverable files, including unsaved Word documents.
Step 4: Once the scan is complete, the data recovery tool will display a list of all the recoverable files found on the selected drive.
Step 5: Look for the unsaved Word document you want to recover from the list of recoverable files.
Step 6: Select the unsaved Word document and click on the “Recover” button to save the file to a new location on your Mac.
And that’s it! It’s always advisable to save your work regularly to avoid losing any data in case of unexpected system shutdowns or crashes.
Also read: How To Find WiFi Password on Mac?
Useful Tips to Avoid Accidental Deletion of Word Files
Here are some tips to avoid accidentally deleting Word files:
1. Create regular backups of your Word files, either by saving them to an external drive or cloud storage.
2. Use Word’s AutoSave feature to automatically save changes made to a document every few minutes.
3. Use “Save As” to create a new version of a document rather than overwriting the existing file.
4. Lock files using file permissions to prevent unauthorized access and accidental deletion.
5. Keep files organized to make it easier to locate and access them.
6. Double-check before deleting files, and enable a confirmation dialog box in the recycle bin settings to prevent accidental deletion.
Conclusion
This wraps up our guide on how to recover an unsaved Word document on Mac. From utilizing Word’s built-in AutoSave feature to searching for temporary files or using third-party data recovery tools, there are multiple approaches you can take depending on your specific situation. It’s always best to save your work frequently and create backups to prevent the loss of important data.
By following the methods outlined in this blog, you can increase your chances of recovering an unsaved Word document and avoid the frustration of having to recreate your work from scratch.
Was this post helpful? Which method did the trick for you? Feel free to share your thoughts in the comments box!
 How to Recover Data from External Hard Drive on Mac?
 How To Start and Use Mac In Recovery Mode?
 10 Best Data Recovery Software for Mac 2024
 How to Recover Deleted Data Files on Mac