How To Password Protect Folder on Mac

In this digitally driven world, data is one of our prime assets. It plays a vital role in our modern lives and helps us to be more productive. To make sure that our private and sensitive info is not sabotaged, one needs to take extra measures to enhance security and privacy to protect our data.

Password-protecting our folders is a great idea to prevent unauthorized access and to keep the content of the folder private. Be it your family pictures or some important financial documents, password-protecting a folder will ensure that the contents of that folder are only accessible to those who are authorized to access them. So, yes, you can easily store any sensitive content on your device and then password-protect it to stop people from accessing it.
Wondering how to password protect folder on Mac? We’ve got you covered. In this post, we have listed a complete guide on how to lock a folder on Mac by adding a password.
|
But before we begin…
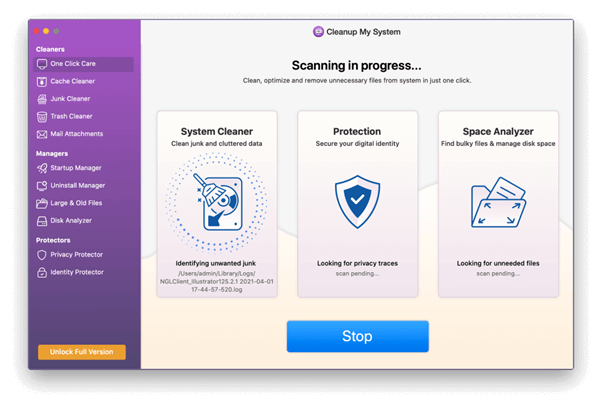
Are you constantly struggling with the slow and sluggish performance of your Mac? Download and Install the Cleanup My System app to fine-tune your Mac’s speed and performance in just a few clicks. Cleanup My System is an efficient tool that will help you restore system speed and instantly free up storage space on your device. It is a professional tune-up and optimizer tool that removes junk files, unwanted email attachments, and other obsolete data that occupy unnecessary storage space on your system. Get Cleanup My System
|

Also read: 10 Best Mac Optimizer Software For Better Performance 2023
How to Password Protect Folder on Mac ?
To password-protect a folder on a Mac, you can select one of these methods. Either take the help of Mac’s built-in Disk Utility tool to create an encrypted disk image of the folder or use third-party tools to get the job done.
Method 1: Password Protect Your Folders with Disk Utility Tool
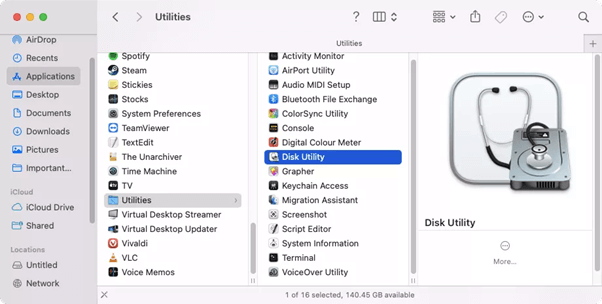
Step 1: Launch the Spotlight search and look for “Disk Utility”. Alternatively, you can also navigate to Applications> Utilities> Disk Utility to open the app.
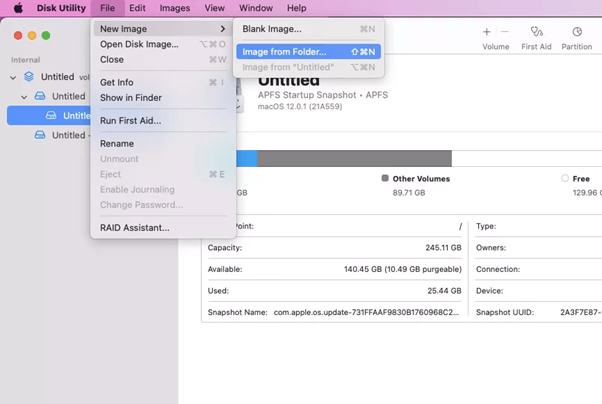
Step 2: On the top menu bar, tap on File> New Image> Images from Folder.
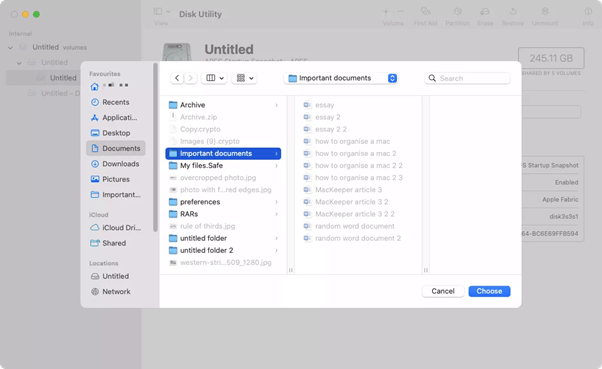
Step 3: You will now see a list of folders on the screen. Pick the folder that you need to password-protect and then tap on the “Choose” button.
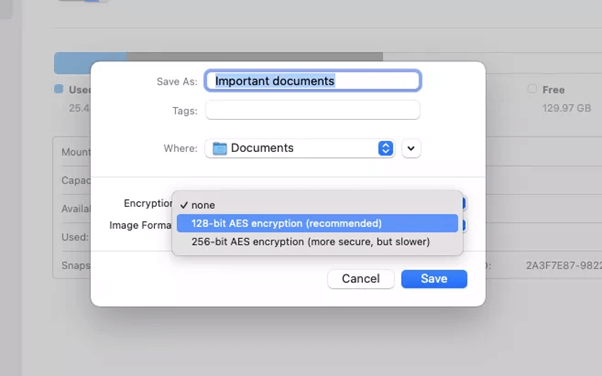
Step 4: Now, tap on the “Encryption” option and then select “128-bit AES encryption”. Hit on the “Save” button to proceed.
Step 5: Enter the password and then re-enter it in the “Verify” text box. Hit on the “Choose” button to set the password.
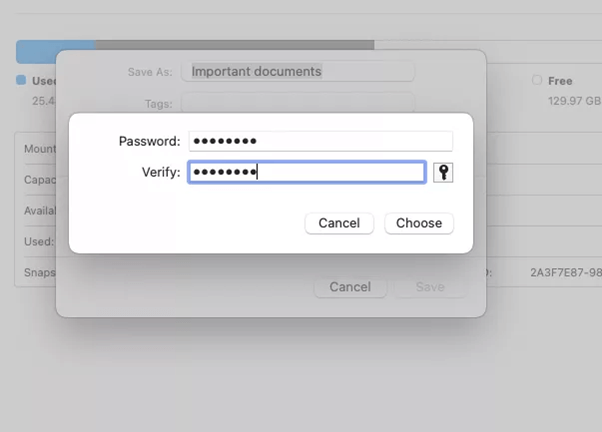
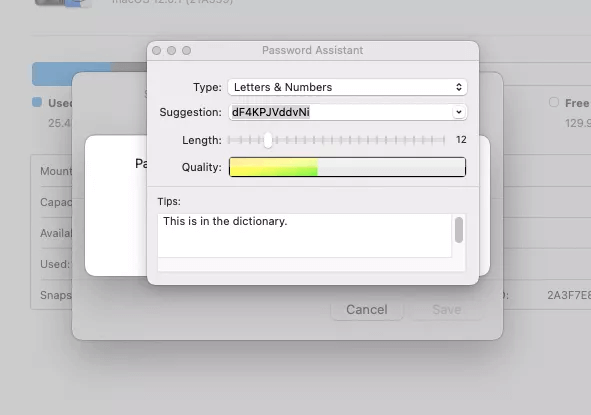
Alternatively, you can also ask macOS to pick a strong password for you. Tap on the key icon placed in the window to review suggestions.
Step 6: After choosing the password, tap on the “Image Compression” option. Select “read/write” so that you can easily add or remove contents in the password-protected folder.
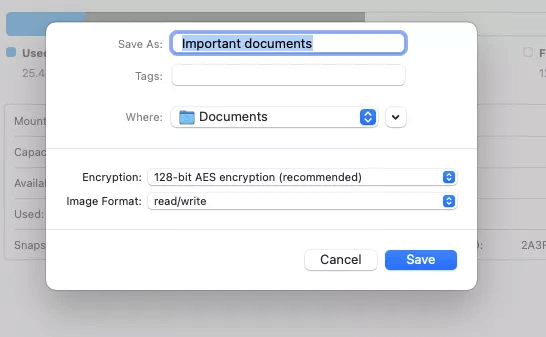
Step 7: Hit on the “Save” button.
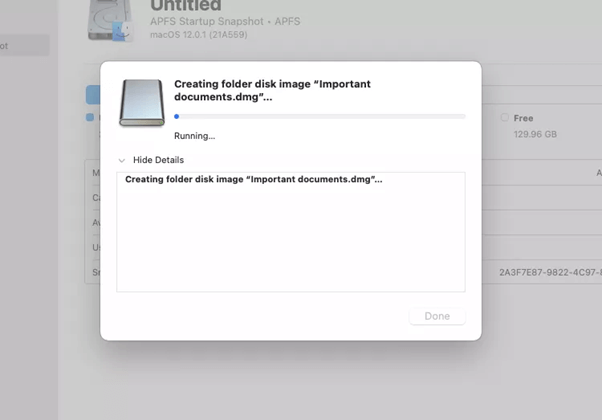
The Disk Utility tool will now get to work and create a password-protected folder on your Mac to encrypt its content.
Once this process is done, whenever you tap on this folder, macOS will prompt you to enter the password.
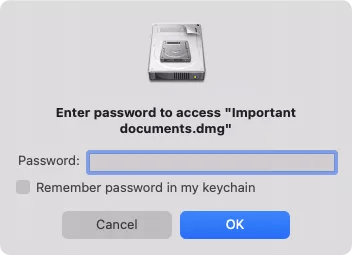
Enter the password and hit on the OK button to access the content of the folder.
Method 2: Use the Third-Party Tools
Alternatively, you can also use third-party tools to password-protect folders on Mac. Compared to Disk Utility, third-party tools will offer an added set of features and functionality.
Although, encrypting folders using the Disk Utility tool has one catch and i.e. anyone can easily find and delete your password-protected folders. Hence, in this case, using a third-party tool will offer you more security to protect the folder’s content. Some of the most popular apps that you can use for password-protecting folders on Mac include Encrypto, Folder Lock, Data Guardian, Concealer, and more. These tools are reliable and worth checking out!
Also read: How to Fix “Your Connection is Not Private” Error on Mac
How to Password Protect Individual Files on Mac ?
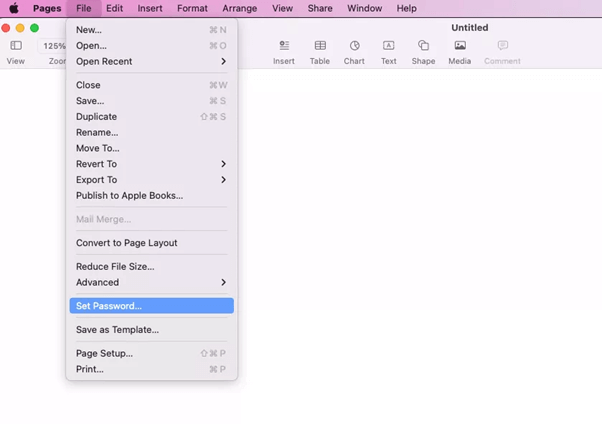
macOS also allows you to password-protect individual files from native apps like Notes, Numbers, Keynote, and Pages. So, if you want to password-protect one or two individual files rather than sealing the whole folder, here’s what you need to do.
Step 1: Launch the application, and tap on File> Set Password.
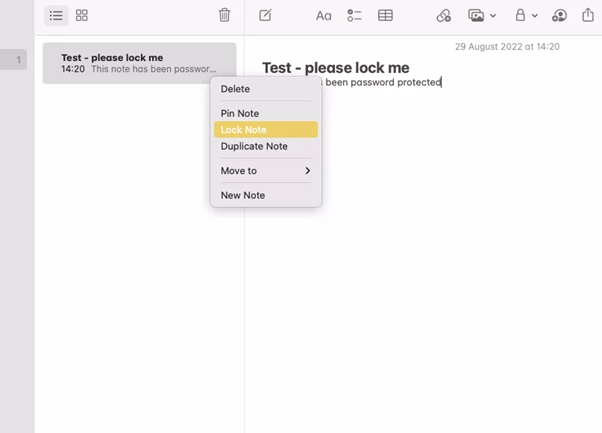
Step 2: For the Notes app, right-click on the note that you need to encrypt and select “Lock Note”.
Also read: Best Mac Apps Must Have
Conclusion
This wraps up our guide on how to password-protect folder on Mac. You can either use the built-in Disk Utility tool or the third-party tools for password protecting your files and folders on macOS. Encrypting your folders with a password will prevent unauthorized access and will protect your data.
Do let us know which method you would prefer for password-protecting folders on Mac. Feel free to share your thoughts in the comments box!
 Best Productivity Apps For Mac in 2024
 How To Fix Macbook Stuck on Loading Screen?
 Best PDF Password Remover for Mac in 2024
 10 Best Password Managers For Mac 2024