How to Turn on Do Not Disturb on Mac
Notifications are quite helpful because they keep you updated on events, news, and other important information you might not have otherwise known about. They can also be necessary for reminders, such as upcoming appointments or deadlines, which help you stay on top of your schedule. Notifications and alerts also provide feedback and updates on tasks you’re working on or projects you’re involved in. On average, we receive about 50-60 push notifications on our devices, including smartphones and laptops.
However, too many notifications can be distracting and overwhelming, so it’s important to manage them carefully. Don’t you agree? Wondering how to use ‘Do not disturb’ on Mac? You’ve come to the right place.
In this post, we have listed a complete guide on how to enable the Do not disturb feature on MacBook to keep distractions at bay.
Let’s get started.
What is Do Not Disturb on Mac?
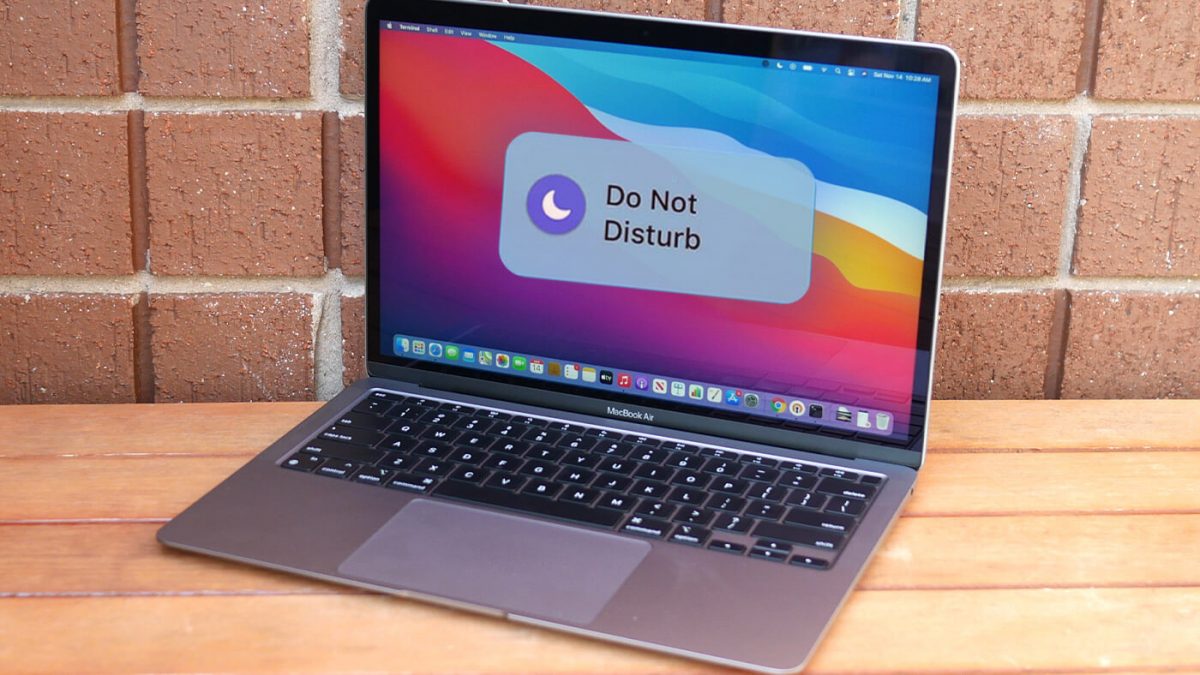
“DND” on a Mac refers to “Do Not Disturb” mode, a feature that temporarily disables notifications and alerts on your computer. When Do Not Disturb is enabled, notifications will not appear on the screen, and sounds and vibrations will be silenced. This is useful when you want to focus on a task or don’t want to be interrupted by notifications during a meeting or presentation.

In Do Not Disturb mode, you can still access your notifications by clicking on the Notification Centre icon in the menu bar. Do Not Disturb can be scheduled to turn on automatically during certain times of the day, or you can turn it on or off manually at any time.
How to Turn On Do Not Disturb on MacBook?
Notifications, whether in the form of a pop-up, a red number indicating unread messages, a vibration, or a sound, can significantly distract you for a considerable amount of time. Instead of waiting for this to occur, why not take advantage of the latest technological features that can help minimize distractions while you work or relax?
Here’s how you can enable the do not disturb on Mac.
Method 1: Using the Keyboard Shortcuts
To activate the Do Not Disturb feature on your Mac, you can use a keyboard shortcut, which is one of the many default shortcuts that come with your computer. This can be a fast way to turn on the feature and maintain your workflow.
To enable Do Not Disturb using a keyboard shortcut, simply hold down the Option key while clicking on the date and time in the menu bar. This will toggle the Do Not Disturb Focus on or off. Alternatively, if your keyboard has a row of function keys, you can press the F6 button with a moon icon to activate the feature.
Also read: How To Airplay From Mac to TV
Method 2: Via Control Center
The Control Center is a feature introduced in macOS Big Sur that allows you to quickly access frequently used settings and features, including Do Not Disturb. Here’s how to enable Do Not Disturb using the Control Center on your Mac:
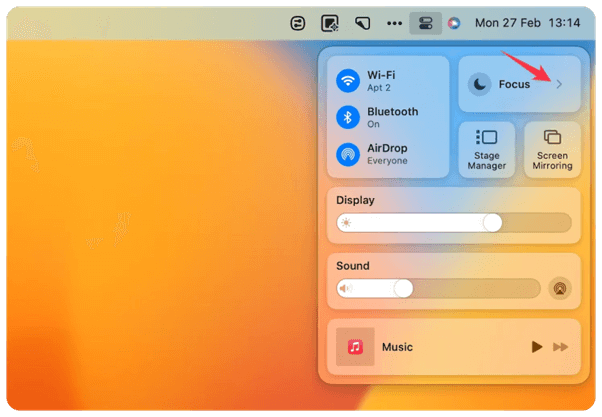
Step 1: Tap on the Control Center icon in the menu bar (it looks like a series of sliders).
Step 2: In the Control Center window that appears, click on the Do Not Disturb button (it looks like a crescent moon). You can find this option in the “Focus” section.
Step 3: The button will turn purple to indicate that Do Not Disturb is now enabled, and you should no longer receive notifications or alerts on your Mac until you turn it off.
Step 4: To turn off Do Not Disturb, simply click on the button again, and it will turn white.
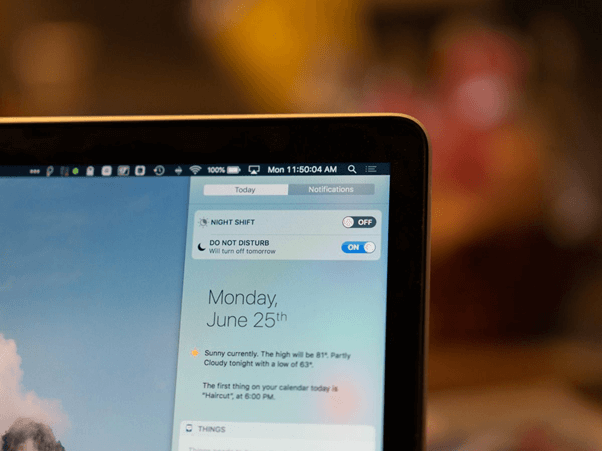
Note that you can also customize how Do Not Disturb works by going to System Preferences > Notifications > Do Not Disturb. From here, you can set a schedule for when Do Not Disturb should be automatically enabled, choose which apps can bypass Do Not Disturb, and more.
Also read: How To Find WiFi Password on Mac?
How to Turn Off Do Not Disturb on Mac?
First, open the Control Center, and click on its icon located in the upper-right corner of the menu bar. Once it is open, you should see a section labeled “Do Not Disturb” which is represented by a moon icon.
To turn on the feature, click on the moon icon, and it will be highlighted in color. Conversely, clicking on the highlighted moon icon will turn off Do Not Disturb, and the icon will appear grayed out.
How to Schedule Do Not Disturb on Mac?
Scheduling Do Not Disturb on your Mac can be a great way to automatically enable the feature during specific times of the day, such as when you’re in a meeting or need to concentrate on a task. Here’s how to schedule Do Not Disturb on your Mac:
Step 1: Tap on the Apple menu in the top-left corner of the screen and select “System Settings.”
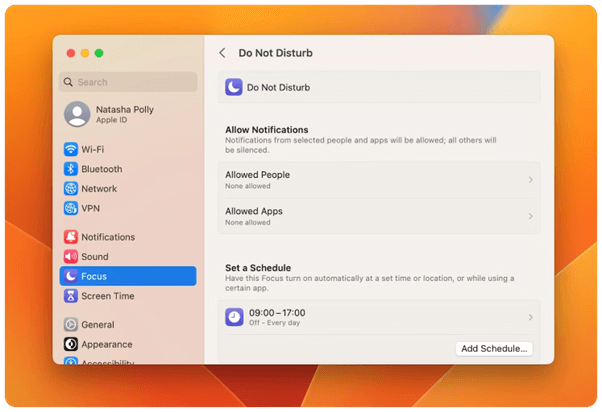
Step 2: Switch to the “Focus” tab from the left menu pane. Select “Set a schedule” to set your preferred settings.
By scheduling Do Not Disturb on your Mac, you can ensure that you won’t be interrupted during important times, and you can stay focused on your work without having to manually enable the feature every time.
Also read: How To Transfer Files From Mac to Mac
Conclusion
The Do Not Disturb feature on your Mac can be a valuable tool to help you stay focused and minimize distractions during your workday. Whether you choose to enable it using a keyboard shortcut or through the Control Center, it can be easily customized to fit your needs and preferences. By taking advantage of this feature, you can increase your productivity and better manage your time while using your Mac. So next time you need to stay focused and avoid interruptions, remember to enable Do Not Disturb on your Mac.
Was this post helpful? Do you think do not disturb is a useful feature on macOS? Feel free to share your thoughts in the comments section.
 Best Fan Control Apps for Mac in 2024
 MacBook Pro Touch Bar Not Working? Here’s How to Fix It
 How To Use iMac as Monitor In 2024
 How To Start and Use Mac In Recovery Mode?