How to Stop Annoying Microsoft AutoUpdate Pop-Ups on Your Mac
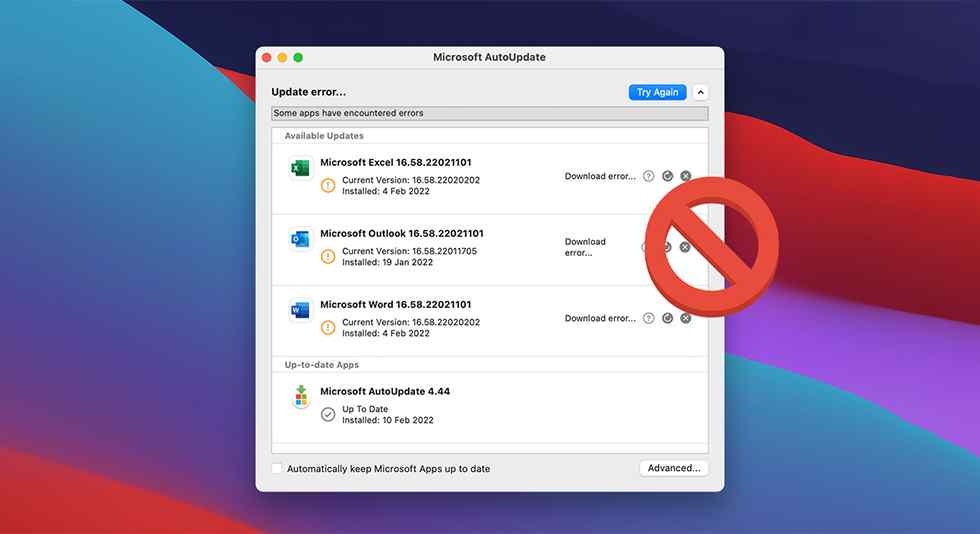
For Mac users with Microsoft applications installed, the convenience of automatic updates can quickly turn into an annoyance. Microsoft AutoUpdate, a feature designed to keep your Office suite and other Microsoft products up-to-date with the latest features and security patches, can sometimes disrupt your workflow or consume valuable bandwidth.
Fortunately, there are steps to remove Microsoft AutoUpdate on Mac and regain control over when and how updates are installed.
In this guide, we’ll walk you through the process of disabling Microsoft AutoUpdate on your Mac, providing you with the freedom to choose when to update your Microsoft applications. Whether you’re looking to avoid unexpected interruptions during critical tasks or simply prefer a more hands-on approach to software updates, this article will equip you with the knowledge you need to take charge of, when it comes to your Mac’s Microsoft applications.
Let’s dive in!
What is Microsoft AutoUpdate?
Microsoft AutoUpdate is a utility designed to keep Microsoft applications on Mac up-to-date with the latest features, improvements, and security patches. It operates in the background, periodically checking for available updates and automatically downloading and installing them.
While it can be useful for keeping your Microsoft software up-to-date, some users may wish to disable Microsoft AutoUpdate for various reasons. If you’re one of them, keep reading!
Also read: How to Recover Unsaved Word Documents on Mac
How to Turn OFF Microsoft AutoUpdate on Mac?
Wondering how to stop Microsoft AutoUpdate on Mac? Here are a few methods that you can try!
Method 1: Disable AutoUpdate in the MS AutoUpdate settings
The easiest way to disable Microsoft AutoUpdate is through the AutoUpdate settings menu. Here’s how:
Step 1: Click on the Microsoft AutoUpdate icon in the menu bar at the top of your screen. Select “Preferences” from the drop-down menu.
Step 2: Uncheck the box next to “Automatically download and install”. This will prevent AutoUpdate from running in the background and checking for new updates.
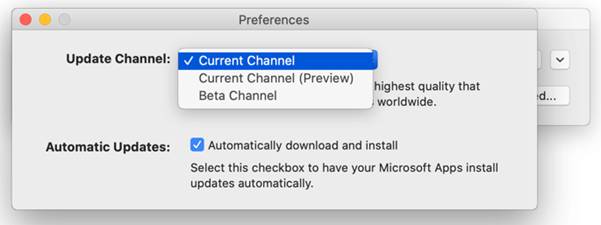
Step 3: You can also uncheck “Download updates automatically” and “Install updates automatically” to further disable the automatic downloading and installation of updates.
Step 4: Close the Preferences window. Microsoft AutoUpdate will now be completely disabled and won’t run unless launched manually.
Also read: How to Access and Control Mac Remotely For Any Device
Method 2: Remove Microsoft AutoUpdate from your Login Items
Here comes another method to disable Microsoft AutoUpdate on Mac. Microsoft AutoUpdate is configured to launch automatically when you log in to your Mac. Hence,removing it from your Login Items list will stop it from starting it up automatically when you log in:
Step 1: Go to System Preferences > Users & Groups.
Step 2: Select your user account, then click the Login Items tab.
Step 3: Find Microsoft AutoUpdate in the list and select it.
Click the – button below the list to remove it
Step 4: Log out and back in again. AutoUpdate will no longer launch at login.
Also read: Best MS Paint Alternative for Mac: Get This Mac Equivalent To MS Paint Today!
Method 3: Delete the Microsoft AutoUpdate install folder
You can fully uninstall Microsoft AutoUpdate by deleting its install folder:
Step 1: Open Finder and go to Applications > Utilities.
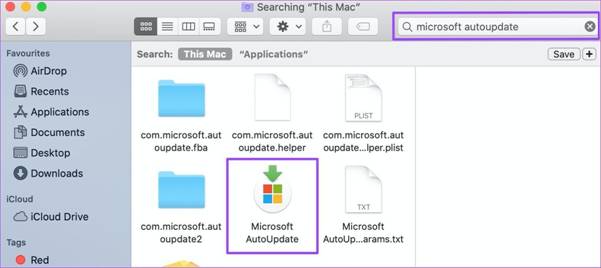
Step 2: Right-click on the “Microsoft AutoUpdate” folder and select “Move to Trash”.
Step 3: Empty your Trash to fully delete the AutoUpdate folder.
Without the program files, AutoUpdate will no longer be able to run on your system. This completely removes it.
Important Things to Keep in Mind:
- Disabling Microsoft AutoUpdate means you’ll need to manually check for and install updates to Microsoft applications. Your apps may become outdated over time.
- Some apps like Office 365 may continue to prompt you to enable AutoUpdate even if you disable it.
- To re-enable AutoUpdate in the future, download and install it again from Microsoft’s website.
In summary, Microsoft AutoUpdate on Mac can be disabled through AutoUpdate settings, removing it from Login Items, using a custom launch agent, or uninstalling it completely. Just be aware that you’ll need to stay on top of Microsoft app updates yourself going forward.
Also read: How to Fix OneDrive Not Syncing on Mac: 8 Quick Solutions
Conclusion: Is Microsoft AutoUpdate Still Driving You Crazy?
By following the steps outlined in this guide on how to remove Microsoft AutoUpdate on Mac, you’ve taken a proactive approach to managing updates for your Microsoft applications on Mac. Disabling Microsoft AutoUpdate Mac empowers you to decide when and how your software is updated, putting you in control of your digital workspace.
Whether you prefer to schedule updates during non-critical times or want to conserve bandwidth, this newfound autonomy will streamline your workflow and enhance your computing experience.
With these tools at your disposal, you can now navigate your Mac’s Microsoft applications with confidence and ease.
 How To Turn Off Auto Brightness On Mac
 8 Best Stop Motion Software for Mac In 2024
 How To Stop The Spinning Wheel On Mac
 Best Ways To Stop MacBook Screen Flickering