How to Clear Recents on Mac Finder Without Deleting
You’ve probably noticed the “Recents” section in your Finder sidebar if you’re a Mac user. This handy feature keeps track of the files and folders you’ve recently accessed, allowing you to revisit them quickly without navigating through multiple directories. However, sometimes, the Recents list can become cluttered, revealing sensitive files or folders you’d rather keep private.
Clearing the Recents list is straightforward, but deleting the entire folder may not be the best solution, as it can lead to data loss or system issues.
In this article, we’ll explore various methods to clear the Recents folder on Mac Finder without permanently deleting it.
What is the Recents folder on your Mac?
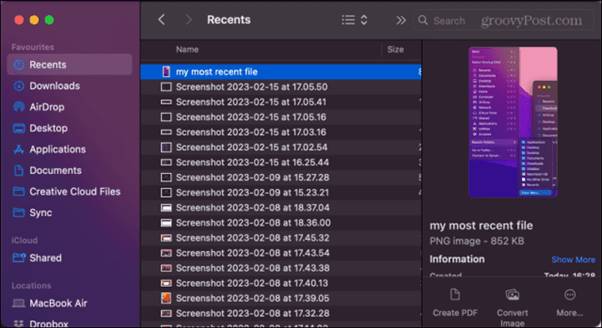
The Recents folder is a virtual location on your Mac that displays a list of recently accessed files, folders, and applications. It’s not a physical folder stored on your hard drive; it’s a dynamic list maintained by the Finder application. This feature makes file navigation more efficient by providing quick access to your most recent work.
However, the Recents folder can become cluttered over time, revealing files or folders you may not want others to see if they use your computer.
Also read: How to Find Application Folder on Mac
How to clear Recents Folders results on Mac Finder?
The simplest way to clear the Recents folder is to use the Finder’s built-in “Clear” menu option. Follow these steps to clear the Recents folder on Mac:
Step 1: Open the Finder application on your Mac.
Step 2: In the Finder sidebar, locate and right-click (or Control-click) on the “Recents” section.
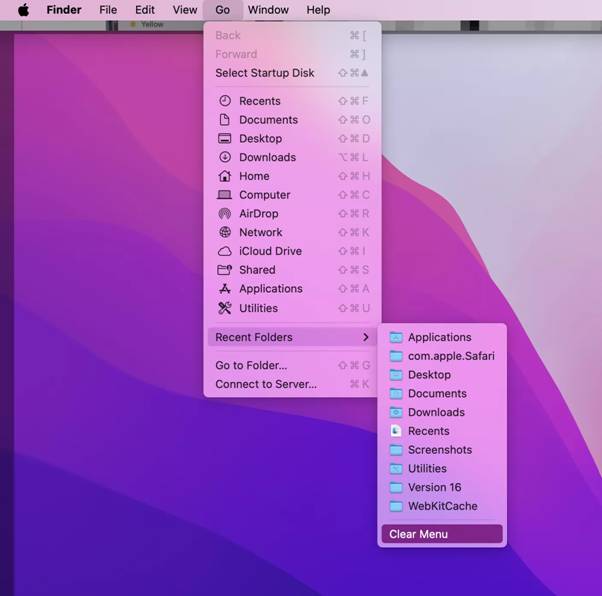
Step 3: From the contextual menu that appears, select “Clear Menu.”
This method will instantly clear the Recents list, removing all entries from the section. However, it’s important to note that this action is temporary, and the Recents folder will begin populating again as you access new files and folders.
Also read: How To Password Protect Folder on Mac
Hiding the Recents Folder from the Finder Sidebar
Even after clearing the Recents list, the Recents folder itself may still be visible in the Finder sidebar, which can be an unwanted distraction. If your goal is to remove the Recents folder from view in the Finder completely, you can follow these simple steps to clear Recents folder on Mac by simply hiding it:
Step 1: Launch the Finder application on your Mac.
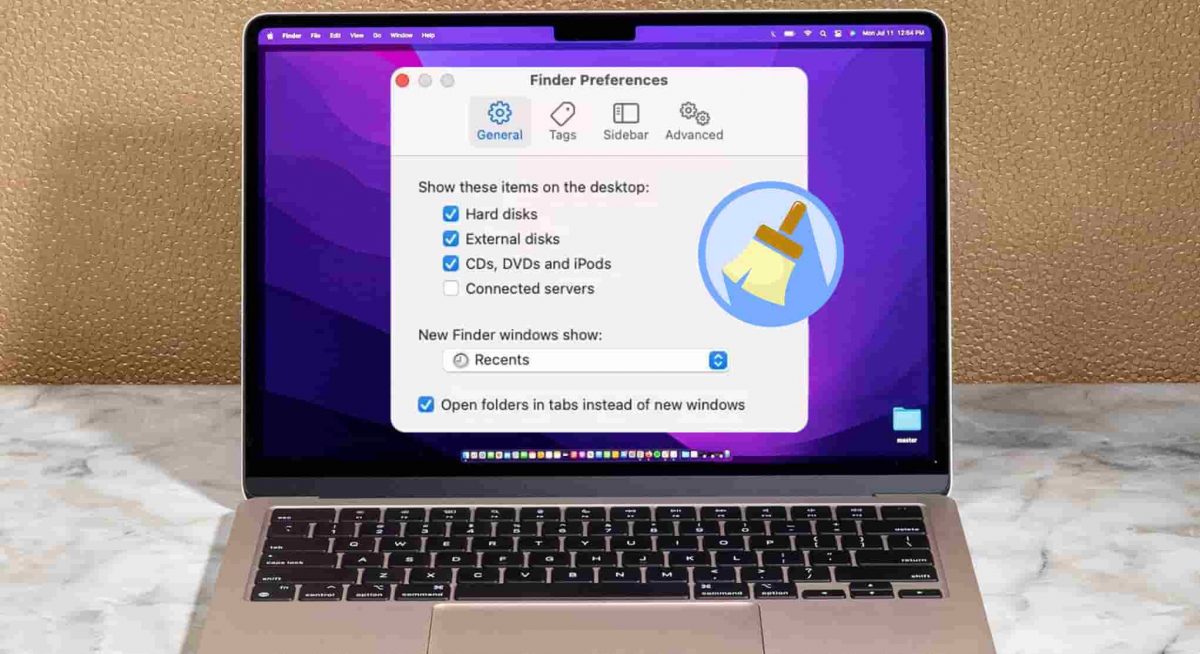
Step 2: From the top menu bar, select “Finder” > “Preferences.”
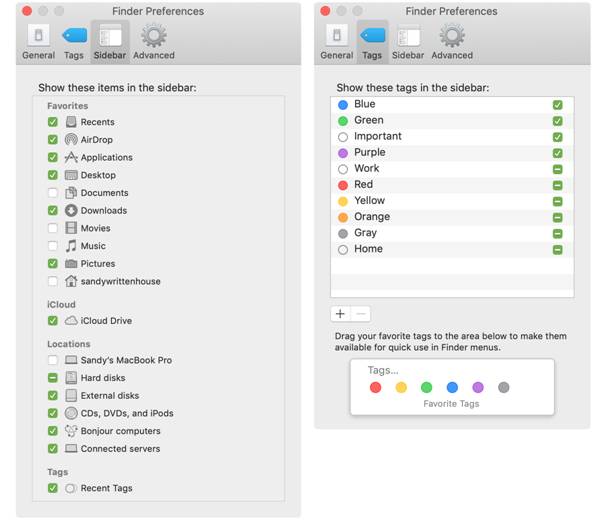
Step 3: Switch to the “Sidebar” tab in the Preferences window. Locate the “Recents” option and uncheck the box next to it.
Step 4: Click “Close” to save the changes and exit the Preferences window.
By unchecking the “Recents” option in the Finder Preferences, you’ve effectively hidden the Recents folder from the Finder sidebar. This action doesn’t delete or clear the Recent data; it simply removes the folder from view, providing a cleaner and less cluttered sidebar experience.
If you ever want to restore the Recents folder to the sidebar, revisit the Finder Preferences and re-check the “Recents” option.
Also read: How To Check Disk Space On Mac: 5 Different Ways
How Do You Clear Recents On Mac Without Deleting
Are you wondering how to clear Recents on Mac? Let’s get started. While the clear menu option and removing the Recents folder from the Finder sidebar can be effective solutions, some users may prefer to keep the Recents folder intact while selectively removing specific entries.
Here are three methods to clear the Recents folder on Mac:
Method 1: Hide Startup Disk from Spotlight Search
One way to prevent certain files or folders from appearing in the Recents list is to exclude them from Spotlight indexing. Spotlight is the system-wide search feature on macOS, and it’s responsible for populating the Recents folder. By hiding specific items from Spotlight, you can effectively remove them from the Recents list without deleting any data. Here’s how:
Step 1: Open the System Preferences application on your Mac. Click on the “Spotlight” preference pane.
Step 2: In the “Privacy” tab, click the “+” button to add a new location. Select the folder or disk you want to exclude from Spotlight indexing (e.g., your startup disk or an external drive).
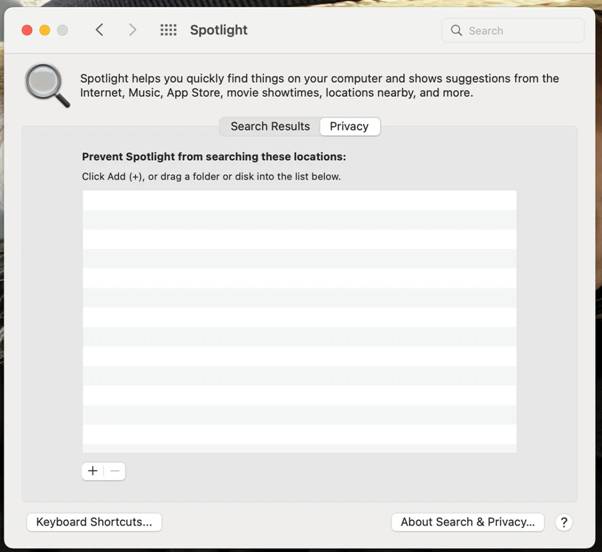
Step 3: Once selected, the folder or disk will be added to the Privacy list, and Spotlight will no longer index its contents.
This method is beneficial if you want to prevent sensitive or private folders from appearing in the Recents list without removing them entirely from your system.
Method 2: Rename the file to hide it from the Recents folder
Another simple way to remove specific files or folders from the Recents list is temporarily renaming them. The Recents folder relies on file and folder names to populate its entries, so by renaming a file or folder, you can effectively hide it from the Recents list without deleting it. Here’s how:
Step 1: Locate the file or folder you want to remove from the Recents list in the Finder.
Step 2: Right-click (or Control-click) on the item and select “Rename” from the contextual menu.
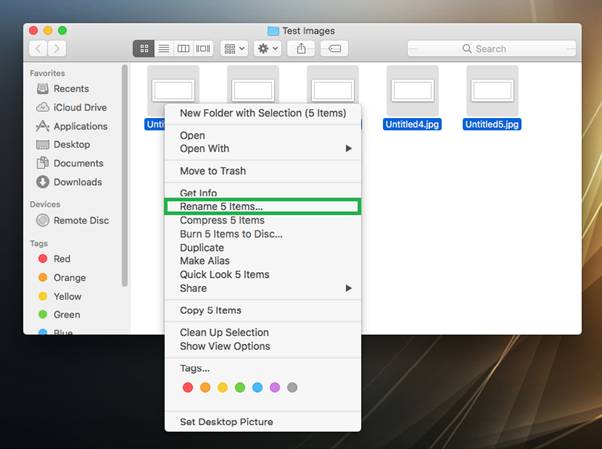
Rename the file or folder by adding a prefix or suffix to its name (e.g., “old_filename.txt” or “filename_old.txt”).
Step 3: Press Enter to confirm the new name.
The renamed file or folder will now be removed from the Recents list, as the Finder no longer recognizes it with the new name. Once you’re ready to access the file or folder again, simply rename it back to its original name, and it will reappear in the Recents list.
Method 3: Move files to an encrypted drive
If you have sensitive files or folders that you want to keep completely private, you can move them to an encrypted drive or volume. macOS includes built-in disk encryption features, such as FileVault and Encrypted Disk Images, which can help protect your data from unauthorized access. By storing sensitive files on an encrypted volume, you can ensure they won’t appear in the Recents list or any other system-wide search results, effectively keeping them hidden and secure.
Here’s how to create an encrypted disk image and move files to it:
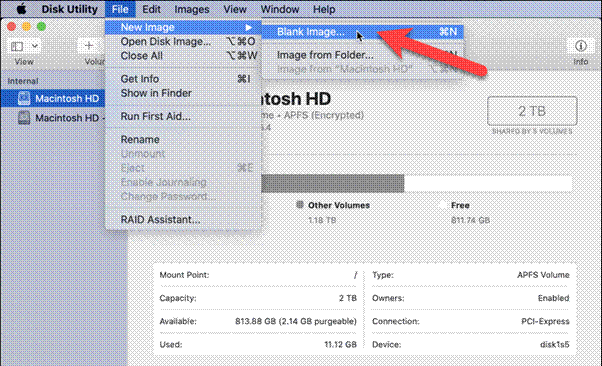
Step 1: Open the Disk Utility application (located in the Utilities folder within the Applications folder).
Step 2: Click on the “File” menu and select “New Image” > “Blank Image.”
Step 3: In the “Save As” dialog, choose a name and location for your new disk image and set the desired size.
Step 4: Under the “Encryption” section, select the desired encryption level (e.g., 128-bit or 256-bit AES encryption).
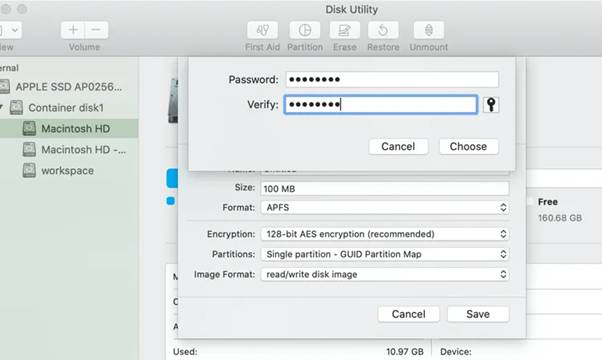
Step 5: Click “Create” to create the encrypted disk image.
Step 5: After creating the disk image, double-click on it to mount it as a new volume. Drag and drop the files or folders you want to keep private onto the mounted encrypted volume.
Step 6: When done, eject the encrypted volume by clicking on the “Eject” button in the Finder sidebar.
By storing sensitive files on an encrypted volume, you can ensure they won’t appear in the Recents list or any other system-wide search results, keeping them hidden and secure from prying eyes.
Also read: How To Find A Full File Path On A Macbook
Conclusion
Clearing the Recents folder on your Mac can be a useful way to maintain privacy and keep your file navigation organized. While the built-in “Clear” menu option provides a quick and easy solution, there are various other methods to selectively remove or hide specific files and folders from the Recents list without permanently deleting them.
Whether you hide items from Spotlight indexing, temporarily rename files, or store sensitive data on an encrypted volume, these techniques offer flexibility and control over what appears in your Recents folder. By mastering these methods to clear the Recents folder on Mac, you can maintain a clutter-free “Recents” list while preserving the integrity of your data and ensuring your privacy on your Mac.
 How to Increase Download Speed on Mac
 How to Refresh on Mac : Boost Your Mac’s Performance
 How To Reduce Ram Usage on Mac | How to Clear Memory on Mac
 10 Best Download Managers For Mac In 2024