How To Find A Full File Path On A Macbook

Finding the full file path of a file on your MacBook is easy once you know where to look. The full file path shows the location of a file on your Mac’s hard drive, starting from the root level down to the specific folder where the file is contained.
Knowing the full file path of a file can be useful for many reasons, such as finding files more easily in Finder, using Terminal commands, or specifying file locations in scripts or applications.
In this article, I’ll explain what a full file path is, why you may need to find one, and different ways to get a file path on Mac.
Also read: How To Fix “Zsh Permission Denied” Error In Mac Terminal
What is a Full File Path on Mac?

A full file path shows the location of a file starting from the root level of the hard drive. It includes all the folders the file is nested within.
For example, a file located at:
MacHD > Users > MyName > Documents > Work > notes.txt
Would have a full file path of:
/Users/MyName/Documents/Work/notes.txt
The full path always starts with the root level of the drive, represented by “/”. Then it shows each folder separated by a forward slash “/”.
The full path allows you to pinpoint exactly where a file is located, rather than just its name. This makes it easier to access files, especially if you have many files with the same name stored in different locations.
Knowing the full file path is also necessary for using terminal commands with a file, like opening or editing a file. It provides the complete directions to locate the file.
Also read: How to Unlock Your Macbook Pro Without Password
When Would You Need the Full File Path?
Before you learn, how to get file path on a Mac, here are some examples of situations where knowing or utilizing the full file path can be beneficial:
- Using Terminal – Many Terminal commands require you to enter the full path to a file. For example, to open a file in TextEdit you would use the command: open /full/file/path/file.txt
- Specifying Locations – Some applications or scripts may require you to enter the file path to locate a file. Providing the full path ensures it can find the exact file .
- Finding Files – If you need to locate a file in Finder but don’t remember where you saved it, having the full path makes it easier to navigate directly to it.
- Organizing Files – Viewing file paths helps you see exactly where a file is located, aiding in better organizing your folder structure if needed.
- Copying/Moving Files – Using the full file path allows you to copy or move a file to an exact directory location.
- Automation – Automation tools like AppleScript can utilize full file paths to precisely access files.
In summary, whenever you need to specify the location of a file, perform an action on a specific file, or find a file more easily, knowing the full file path comes in handy on a Mac.
How to Get File Path on Mac
macOS provides a couple of easy ways to find and view the full file path of a file. Here are the main methods:
View the Full Path in Finder
In the Finder app, you can view the full file path of a file through the Get Info window:
Step 1: Right-click on the file and select “Get Info”.
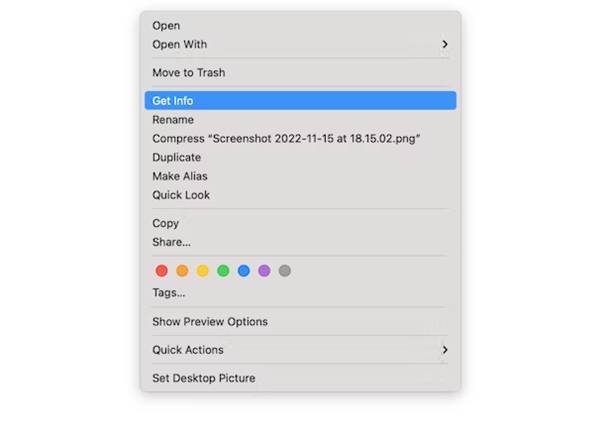
Step 2: In the Get Info window, go to the “General” section.
Step 3: The “Where” field shows the file’s full path.
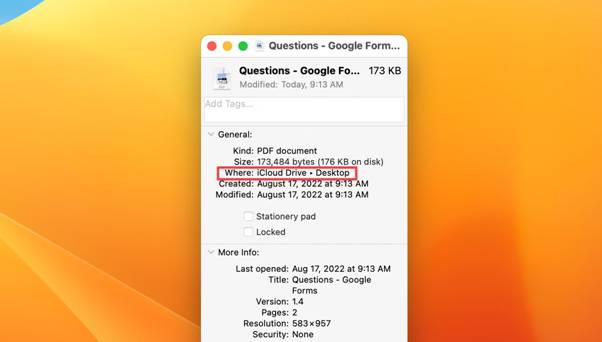
This allows you to quickly find the full path without copying it. You can refer to the path while in the Get Info window.
Copy from Finder
Now that you’ve learned how to get the file path on Mac, let’s proceed. Additionally, you can copy the file path for pasting elsewhere. Here’s how:
Step 1: Right-click on the file and select “Get Info”. In the Get Info window, click on the file path displayed in the “Where” field.
Step 2: The path will be highlighted – press Command+C to copy it. Now you can paste the full path anywhere needed.
Copying the path makes it easy to use the full file path in Terminal, scripts, apps, or anywhere else.
Copy in Quick Look
Files being viewed in Quick Look can also display the file path. To copy it:
Step 1: Select a file and press the Space bar to open Quick Look.
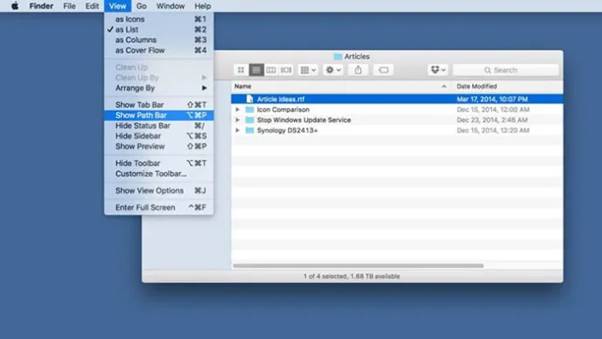
Step 2: Click the Options button in the top right corner (looks like a gear icon). Check the “Show Path Bar” option.
Step 3: The full path will appear highlighted at the bottom – press Command+C to copy it.
This provides another handy way to get the file path without having to open Get Info
Also read: How to Delete Other Storage on Mac: Quickly Recover Storage Space
View in Column View
Finder’s Column View shows the file path for a selected file at the bottom of the window. Using Column view you can quickly see and copy the full path.
Step 1: Open a Finder window in Column view.
Step 2: Navigate to the folder containing the file. Select the file to see its full path at the bottom of the window.
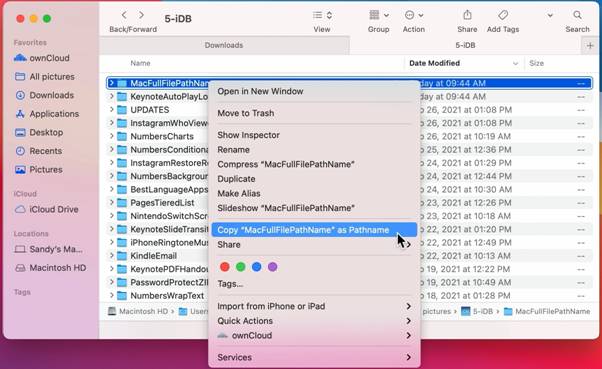
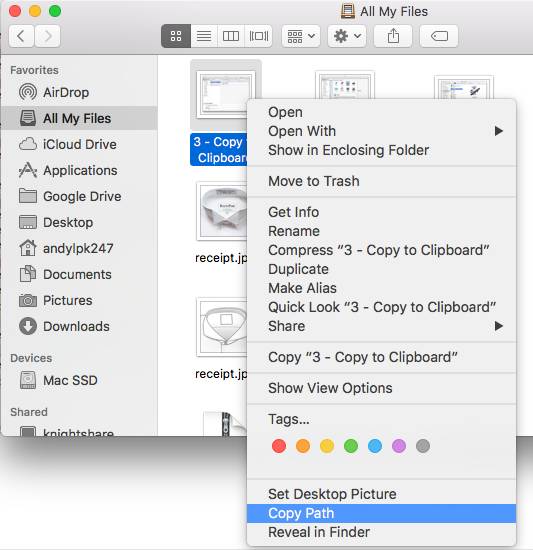
Step 3: Right-click on the path and select “Copy Full Path” to copy it.
Column view gives you an overview of a file’s location and makes the path viewable as you navigate folders.
Copy Path from Tab Bar
In newer versions of macOS, you can also copy the file path right from a Finder window’s tab bar.
Step 1: Open the folder containing the file in a Finder window.
Step 2: Click and hold the folder name in the window’s tab bar. Choose “Copy Path to Clipboard” from the menu.
This copies the full path and lets you quickly paste it anywhere needed.
Also read: iMessage Not Working on Mac? Here’s How To Fix It!
Tips for Working with File Paths on a Mac
Here are some helpful tips for efficiently managing full file paths on your Mac:
- You can press Command+Shift+G in Finder to quickly navigate to a specific path. Just paste or enter the path.
- The tilde ~ symbol represents your home folder in a path. So ~/Documents/notes.txt directs you to your personal Documents folder.
- Simplify inputting file paths in Terminal by dragging and dropping a file from Finder, which will auto-fill the path in a command.
- Use tab auto-completion in Terminal after partially typing a path to quickly fill in the rest.
- If you only know part of the file name, use the find command in Terminal to search for files by name.
- The . (period) represents the current folder location. ./file.txt refers to a file in the current working directory.
- To go up a folder level add .. so ../file.txt goes up one folder level from the current location.
Using these tips can help save you time and effort when utilizing file paths on your Mac!
Conclusion
This wraps up our guide on how to get file path on Mac. Knowing the full file path is vital for easily accessing your files in Finder, Terminal, and other apps on a Mac. By going to Get Info, using Quick Look, viewing Column View, or copying from the tab bar, you can quickly find and copy the full path of any file.
Full file paths allow you to specify locations, find files faster, use Terminal commands, automate tasks, and keep your files well organized. Now that you know the different methods for finding file paths, you can more easily work with your files in macOS.
 A Comprehensive Guide to Cropping Screenshot on Mac: Top 4 Methods
 How to Fix MacBook Pink Screen of Death (7 Solutions)
 How to Enter and Exit Full Screen on Mac
 How to Fix “Macbook Keyboard not Working” Issue on Mac
 How To Fix Wi-Fi Issues On macOS Ventura