How to Delete Other Storage on Mac : Quickly Recover Storage Space
Other Storage Eating Up Your Mac’s Space? Here’s How to Delete It Fast
In the dynamic world of technology, where information flows seamlessly and storage space is is valuable, Mac users often encounter a confusing “Other” category.
You’ve diligently organized your files, cut down on your downloads, and even streamlined your applications, yet that “Other Storage” seems to persist and occupy precious disk space. If you’ve ever wondered what exactly is stored in this category and how to efficiently clean it to recover storage space, you’re in the right place.
Welcome to our comprehensive guide on dealing with the confusing issue of removing “Other Storage” on your Mac.. Understanding how to identify, manage, and ultimately delete “Other Storage” can free up valuable space and enhance the overall performance of your beloved device.
Let’s empower you to master your Mac’s storage and bid adieu to “Other Storage” once and for all. Your device’s performance and storage capacity are about to receive a well-deserved boost!
QUICK TIP to Free Up Other Storage on Mac:
To quickly free up storage space on your Mac, open About This Mac and check the storage tab to see what’s taking up space. Delete unused apps, iOS backups, and local Time Machine snapshots. Also, use Storage Management to store files in iCloud rather than locally. Optimizing your storage in these areas can quickly recover gigabytes of space.
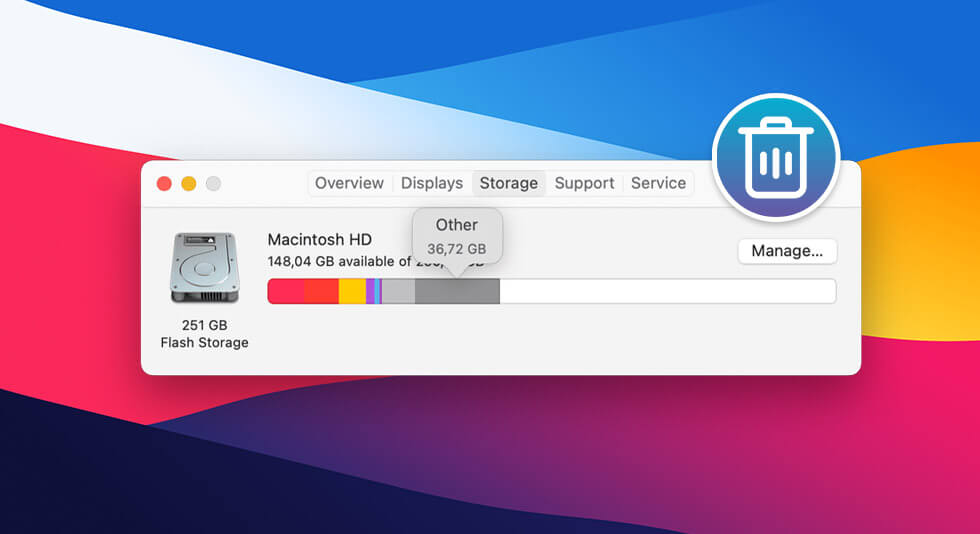
What is “Other” on Mac Storage?
On Mac, the term ‘Other’ Storage refers to a nebulous category of data that occupies space on your hard drive but doesn’t fit neatly into the predefined categories of documents, applications, and media files. This category encompasses a variety of files and data types that aren’t immediately recognizable as specific file types, which can make it a bit mysterious and often not well understood when managing storage on a Mac.
Here are some common data types found in the “Other” storage of macOS:
- System files.
- Cached data.
- Documents, screensavers, sheets.
- Temporary files.
- Plugin data.
- Disk images and archives.
- Old device backups.
- App extensions.
- Application support files.
While some ‘Other’ Storage is necessary for system and application functionality, it’s also true that this category can sometimes become bloated and unnecessarily consume a significant portion of your storage. This can potentially lead to performance issues, slow system speeds, and a reduced amount of available space for your files and applications.
Read further to learn about how to delete other storage on Mac to quickly recover precious storage space on your device.
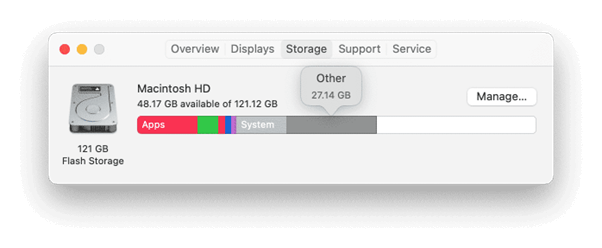
How to Find Other Storage on Mac?
Before you learn about how to remove other storage on Mac, here’s something to consider.
To help you locate “Other” Storage on macOS, let’s explore your Library directory. Within this directory, macOS stores application components, widgets, and assorted cache archives. This section of your Mac’s storage is intentionally concealed to prevent accidental disruptions, as altering certain folders here could potentially cause issues. However, let’s proceed with caution and follow these steps:
Step 1: Launch Finder. Navigate to the “Go” menu.
Step 2: Select “Go to Folder.”
Step 3: Paste the following path: ~/Library/Caches
Also read: How to Check Storage on Mac
How to Clear Other Storage on Mac
How to get rid of other storage on Mac? Let’s begin. Eliminating “Other” storage on Mac may not be possible, but you can certainly minimize the storage space it occupies. In the following sections, we’ll explore different categories of “Other” files and guide you through the process of how to delete other storage on Mac.
1. Remove Documents, Large and Unused Files
It’s easy to overlook how much space basic text documents use, but you might be surprised by the size of certain .pages and .csv files. This is even before adding images, downloading ebooks, or crafting extensive presentations. Over time, your collection of “Other” documents can swiftly grow beyond expectations.
Hence, the first step in our guide to clear other storage on Mac is to find such files and remove them right away.
Follow these steps to manually identify and manage large documents on your Mac:
Step 1: Press the Command + F key combination on your Mac.
Step 2: Select “This Mac” to search your entire system.
Step 3: Click the initial dropdown menu and opt for “Other.”
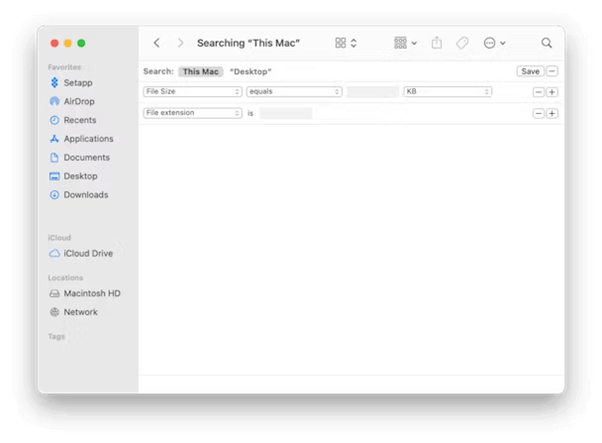
Step 4: In the Search Attributes window, mark both “File Size” and “File Extension.”
Step 5: Enter specific document file types (.pdf, .pages, etc.) and desired file sizes to initiate the search for sizable documents.
Step 6: Examine the results and proceed to delete as necessary.
And that’s it! If you find this process a bit complicated then we do have a simpler solution for you as well. Download and install the “Cleanup My System” app from the Mac App Store, your one-stop platform to fine-tune your Mac’s performance.
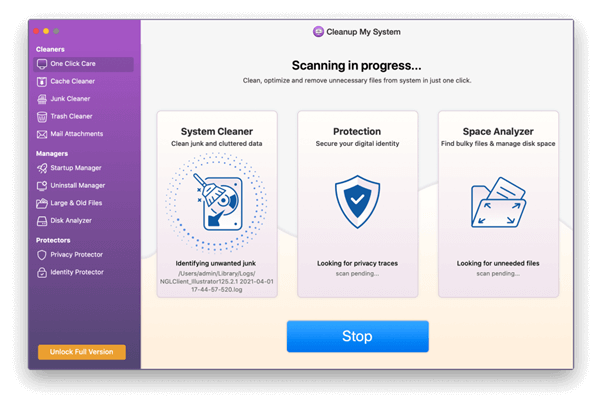
Designed and developed by Systweak Software, Cleanup My System stands as the ultimate solution for decluttering your storage and improving your Mac’s speed. With this expert tune-up utility, effortlessly detect and eliminate redundant files, extraneous email attachments, expansive and outdated files, and more – all achievable with just a single click.
Get Cleanup My System

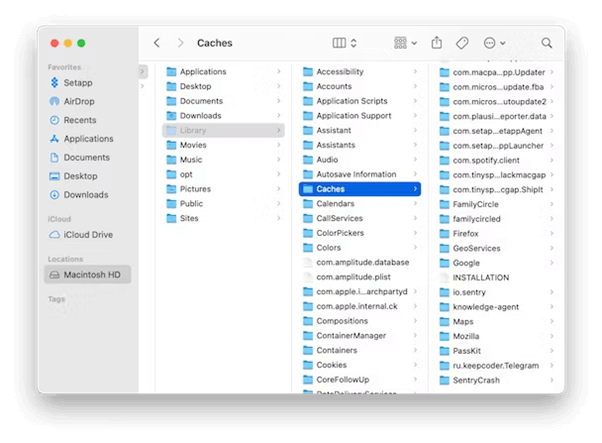
2. Delete Cache Files
Cache files aren’t just hidden clutter; they can hog gigabytes of your precious space. For a manual cache file cleanup on Mac, follow these steps to clear other storage on Mac:
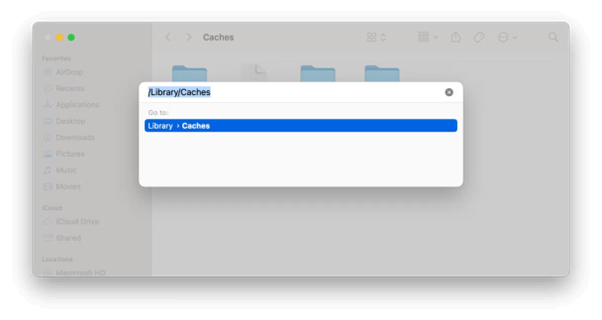
Step 1: Go to the “Go” menu and choose “Go to Folder.” Input ~/Library/Caches and click “Go.”
Step 2: Safeguard the Caches folder by holding Option and dragging it to your desktop as a backup, in case of any issues.
Step 3: Mark all files within the Caches folder.
Step 4: Move the selected files to the Trash.
Step 5: Finally, empty the Trash to complete the process.
Also read: How to Use System Preferences Setting on Mac and Boost Your Productivity
3. Remove App Plugins and Extensions
Applications often come with extra plugins and extensions, contributing to “Other” storage. To free up space, open app settings, find installed plugins/extensions, and delete unnecessary ones.
Here’s how to do it:
Step 1: Launch the Safari browser.
Step 2: Access the Safari menu and choose Preferences.
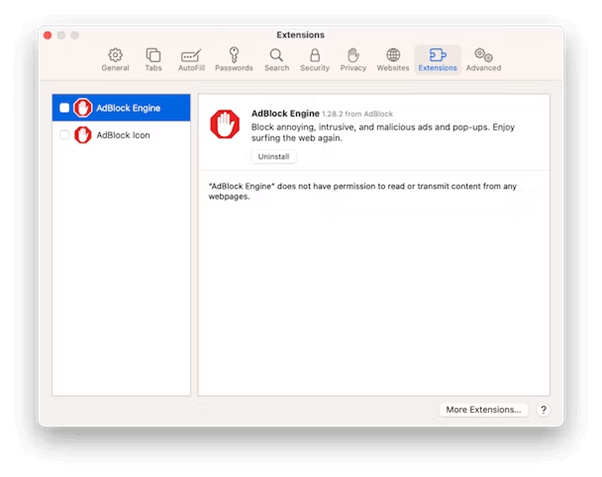
Step 3: Navigate to the Extensions tab.
Step 4: Identify the extension you wish to delete and click “Uninstall.”
Also read: How To Update Safari on Mac: A Step-By-Step Guide
4. Delete Old Time Machine Backups
While Time Machine is a lifesaver for safeguarding your data, constant backups can also contribute to the “Other” storage category. These backups are essential, yet over time, older versions and redundant snapshots can accumulate and occupy substantial space on your Mac. If you find yourself struggling with limited storage, consider managing your Time Machine backups. Here’s how:
Step 1: Click the Apple menu, go to “System Preferences,” and select “Time Machine.”
Step 2: Choose your backup disk from the list.
Step 3: Click “Options” to manage backup exclusions or delete older backups.
Step 4: You can manually remove specific backups by selecting them and clicking “Delete Backup.”
Step 5: Use the “Backup Disk” tab to limit the backup size and prevent excessive storage usage.
5. Clear Disk Images and Archives
Disk images and archives are useful for installing software and sharing files, but it can gradually accumulate at one place like the “Other” storage category on your Mac. These files might include installation packages, compressed archives, and disk images from various downloads. To regain valuable storage space, it’s worth considering a clean-up of these items. Here’s how:
Step 1: Open Finder and navigate to your “Downloads” folder.
Step 2: Look for files with extensions like .dmg, .zip, .tar, .gz, etc.
Step 3: Identify files you no longer need, especially if you’ve already installed software or extracted the contents.
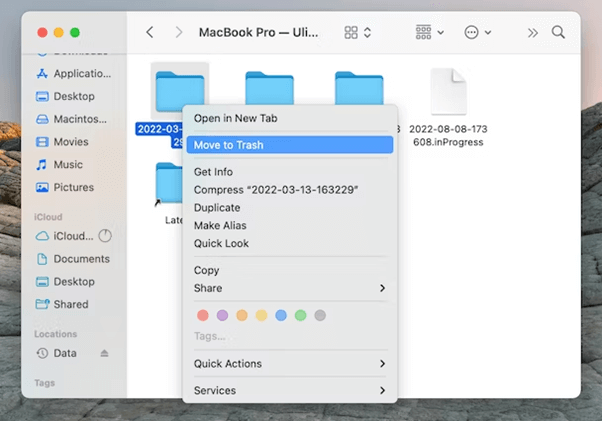
Step 4: Select the unnecessary disk images and archives and drag them to the Trash.
Step 5: After reviewing and confirming you no longer need these files, right-click the Trash and select “Empty Trash” to free up the space.
Also read: How to Delete Messages on Mac: Bid Goodbye to Clutter
6. Delete App Logs and Support Files
Applications on your Mac generate a multitude of files, predominantly logs, and support data. Even after you uninstall the app, these files remain dormant on your hard drive, taking up valuable space without purpose.So, deleting them is a smart choice.
Here’s how:
Step 1: Launch Finder.
Step 2: Use Command-Shift-G and navigate to ~/Library/Application Support.
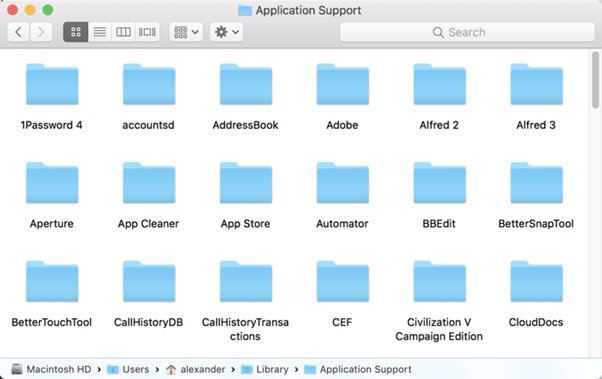
Step 3: Locate folders with the app’s name you’ve removed. Safely move these to the Trash.
Next, proceed to these directories to delete other app-related files:
~/Library/Logs
~/Library/Containers
Also read: How To Reduce Ram Usage on Mac
Congratulations! You Have Successfully Deleted Other Storage on Mac
This wraps up our guide on how to Delete other Storage on Mac. With a solid understanding of how to tackle the enigmatic “Other” storage on your Mac, you’re now equipped to regain control over your device’s performance and storage capacity.
By implementing the strategies we’ve explored – from managing cache files to clearing out unnecessary app remnants – you’re not only freeing up valuable space but also ensuring your Mac runs smoother than ever. So, take charge, declutter, and revel in a more efficient and streamlined Mac experience. Your journey to a tidier, faster Mac starts now.
 How To Install macOS Sonoma Beta on Your Mac
 How To Update Safari on Mac: A Step-By-Step Guide
 Best Cloud Storage Service for Mac in 2024 | Cloud-Based Option For Apple User