How To Erase And Reformat A Storage Device In Disk Utility On Mac
Disk Utility is an application that comes pre-installed on all Macs, enabling you to manage both internal and external disks. It facilitates tasks such as erasing, formatting, partitioning, repairing, and restoring volumes. Erasing and reformatting a storage device is particularly useful when you want to wipe all data, install a different file system, or resolve disk issues.
How do I get an external hard drive formatted for Mac? You’ve come to the right place. Follow this simple guide to learn how to erase and reformat any storage device on your Mac using Disk Utility.
Also read: Best Disk Repair Software For Mac
How to Reformat External Hard Drive Mac: Simple Steps
Step 1: Launching Disk Utility
To open Disk Utility on your Mac, follow these steps to format the hard drive for Mac:
- Click on the Finder icon in your dock or open Finder through the Applications folder.
- Select Applications from the sidebar menu.
- Scroll down to find and open the Utilities folder.
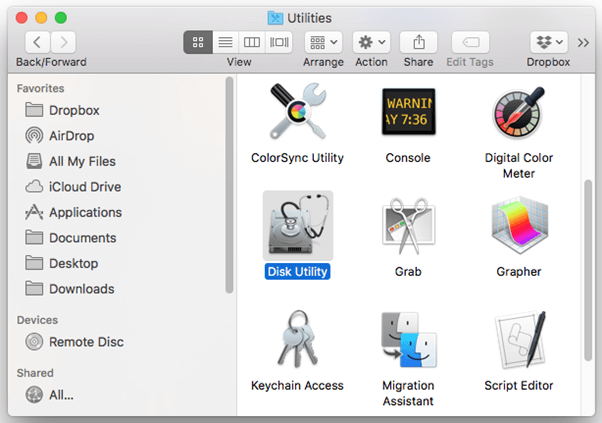
- Double-click on Disk Utility to launch the application.
The Disk Utility window will open showing all available volumes and storage devices on your Mac.
Also read: How to Use Target Disk Mode on Mac: Enjoy Quick File Transfers
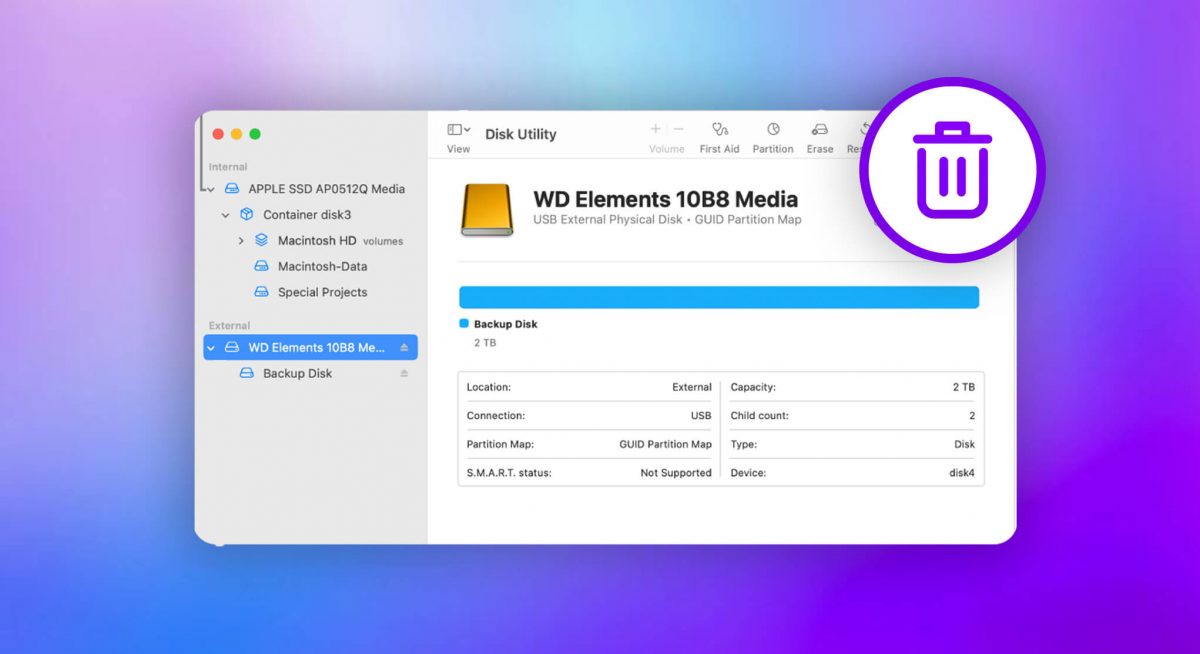
Step 2: Selecting The Storage Device
Once Disk Utility is launched, select the storage device you want to erase and reformat.
- Select the storage device from the left-hand sidebar. Make sure you select the correct one – the name usually indicates if it is an external drive or an internal volume.
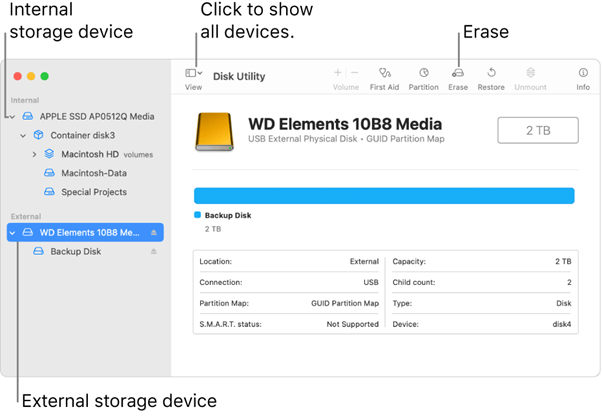
- Information about the storage device will be displayed in the main window once selected.
- Now, click on the Erase tab at the top of the window.
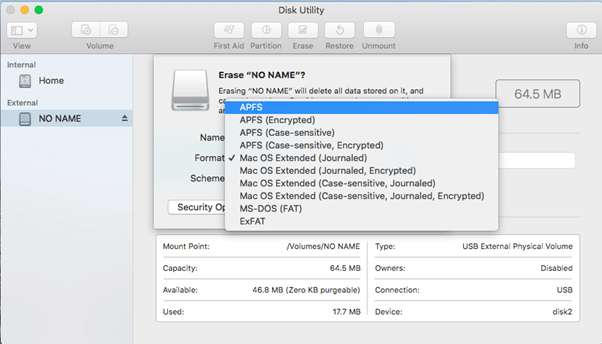
Step 3: Erasing The Storage Device
Erasing or wiping a storage device will delete all data and prep it for reformatting. Here are the steps:
- Make sure the correct storage device is selected from the left sidebar.
- Choose a format type – APFS or Mac OS Extended (Journaled). Use APFS for faster SSDs and flash storage or Mac OS Extended for mechanical hard drives.

- Enter a name for the storage device under Name.
- Select Scheme – GUID Partition Map for most users.
- Choose Format – Mac OS Extended (Journaled) or APFS.
- Click Erase at the bottom to permanently delete all data. This may take a while depending on the drive size.
Done! Your storage device is now wiped clean and prepped for reformatting.
Also read: 10 Best Disk Space Analyzers for Mac
Step 4: Reformatting The Storage Device
Here comes the most crucial step to reformating the external hard drive Mac. After erasing the storage device, you can reformat it with a new file system. Here’s how:
- First, make sure the erased storage device is still selected in the left sidebar.
- Click on the Partition tab at the top of the window.
- Enter a name for the volume under Name – this will be the new drive name.
- Select a format type – Mac OS Extended (Journaled) or APFS.
- Choose the number of partitions if you want separate volumes.
- Adjust the partition size by dragging the handles if needed.
- Click Apply when ready to reformat the device.
- Click Partition to confirm – this will quickly reformat the drive.
That’s it! Your storage device is now erased, reformatted, and ready to use. The new volume will be mounted on your desktop.
Step 5: Erasing External Drives
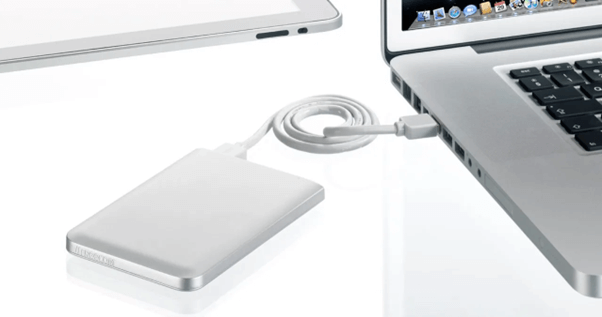
Erasing external USB drives, SD cards, or SSDs works the same way as internal volumes.
- Connect the external drive to your Mac if not already connected.
- Launch Disk Utility and select the external drive from the left sidebar.
- Click Erase, choose a format, and confirm erasure.
- Click Partition, select new format, and reformat the drive.
Once completed, the external drive will be blank and ready to use. Safely eject and disconnect when done.
Also read: How to Check Storage on Mac | Free up Disk Space on Mac
Step 6: Securely Erasing Drives
If you want to completely sanitize and securely erase a drive:
- Choose Security Options under the Erase tab.
- Select a secure erase method – for most purposes, 1-pass or 3-pass is ideal.
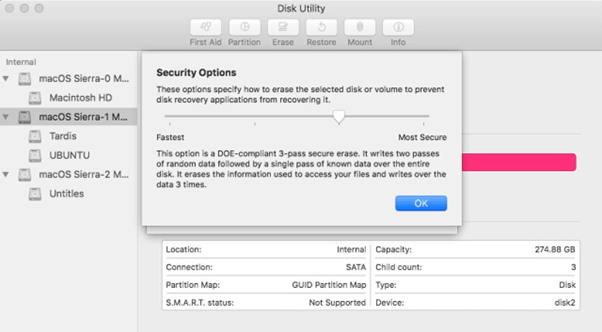
- Click OK and confirm erasure. This will override all existing data.
NOTE: Secure erase takes much longer but ensures no previous data can be recovered. Use for drives containing sensitive information.
Troubleshooting Disk Issues
If you encounter issues while erasing, reformatting, or verifying a problematic disk, try First Aid:
- Click the First Aid tab and select the disk from the left sidebar.
- Click Run to perform diagnostics and repair disk errors.
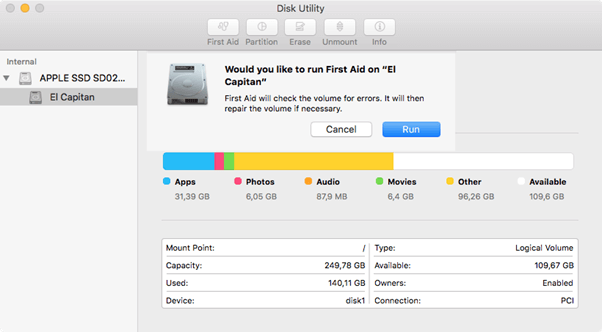
- Repeat steps if First Aid finds problems to re-verify the disk.
- Try re-formatting the disk if First Aid found no issues.
First Aid checks and repairs minor disk problems so that reformatting has a better chance of completing without any underlying issues.
Tips For Erasing & Reformatting
- Always back up your data first before erasing. Reformatting will delete all data.
- If erasing an internal drive to reinstall macOS, boot to Recovery first by holding Command-R on restart.
- Use Mac OS Extended format for older rotating hard disk drives for best performance.
- Choose APFS for SSDs, flash drives, and high-performance storage devices.
- Partition a drive if you need multiple volumes or plan to install an additional operating system.
- Use Extreme Protected Erase for highly sensitive data – it meets government standards for secure deletion.
Erasing, reformatting, and partitioning using Disk Utility is necessary when upgrading drives, troubleshooting performance, wiping your machine before selling, or wanting to completely erase sensitive information. Follow this guide and you’ll be an expert at drive management on Mac in no time.
Conclusion | Your Ultimate Guide to Erasing and Reformatting with Disk Utility on Mac!
Disk Utility provides a simple and effective way to erase, reformat, and manage both internal drives and external storage devices on your Mac. By following the steps in this guide, you can quickly wipe, partition, and reformat any drive to suit your needs. Whether you want to erase sensitive information before selling your Mac, troubleshoot disk issues, or prepare drives for an OS upgrade, Disk Utility has you covered.
With the power of secure erasing, volume formatting, and disk repair, you can optimize and sanitize storage for Mac with just a few clicks.
FAQs:
Q1: How do I reformat an external hard drive for use with my Mac?
To reformat an external hard drive for use with a Mac, connect the drive to your Mac, open Disk Utility, select the drive, click Erase, choose a Mac-compatible format like APFS or Mac OS Extended, name the drive, and click Erase. This will wipe the drive and prep it for macOS.
Q2: What does it mean when an external hard drive is formatted for Mac?
When an external hard drive is formatted for Mac, it means the drive is using a filesystem readable by macOS, usually APFS or Mac OS Extended. Mac cannot read drives formatted with Windows’ NTFS.
Q3: How can I format a hard drive to be used exclusively with Mac computers?
To format a hard drive for exclusive Mac use, connect the drive, launch Disk Utility, select the drive, click Erase, choose a Mac format, name it, then click Erase. This will wipe the drive and make it Mac-compatible.
Q4: Is it possible to have an external hard drive compatible with both Mac and PC without reformatting?
It is possible to have an external drive compatible on both Mac and PC without reformatting by using the exFAT filesystem. exFAT works on macOS and Windows without the need for reformatting.
Q5: What should I consider before formatting an external hard drive for a Mac?
Before formatting a drive for Mac, consider backing up your data, understanding Mac format limitations, checking partition maps, and determining if the drive will be Mac only or need cross-platform compatibility.