How to Use Target Disk Mode on Mac : Enjoy Quick File Transfers
Mac enthusiasts are constantly seeking ways to make their devices more versatile and efficient. Isn’t it? One such feature that often goes unnoticed, yet holds incredible potential, is Target Disk Mode. This powerful tool allows Mac users to transform their system into a high-speed external drive, creating a bridge between two Macs for seamless data transfer.
In this comprehensive guide, we’ll walk you through detailed steps on how to use target disk mode on Mac. Get ready to know all about this invaluable feature, from its basic setup to advanced applications that can revolutionize the way you use your Mac.
By the end of this guide, you’ll not only master the art of enabling Target Disk Mode but also understand how to leverage it to its fullest potential, ensuring quick file transfers.
Let’s dive in!
What is Target Disk Mode on Mac?
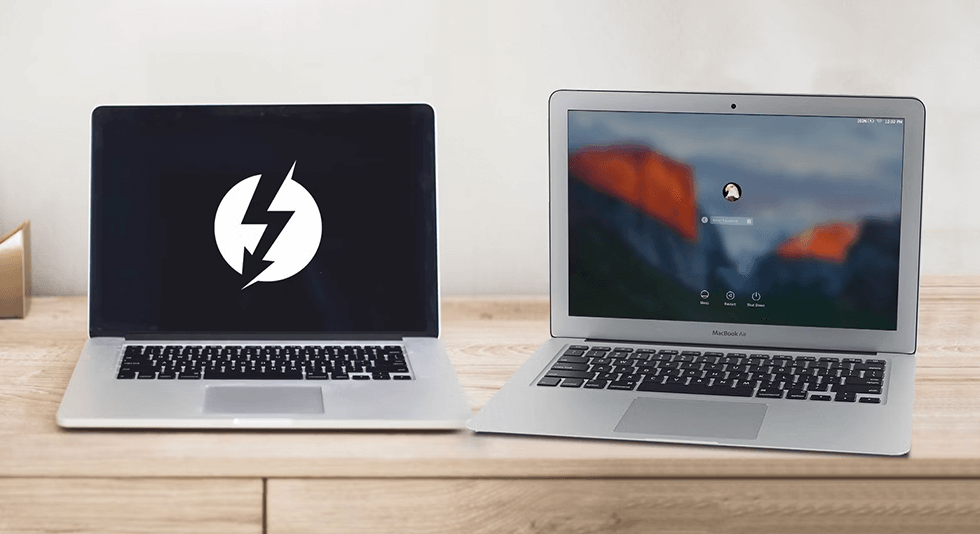
Target Disk Mode on a Mac lets one Mac become a super-fast external hard drive for another Mac. They connect with a special cable, and then one Mac shares its power so the other can use it to move files really quickly. It’s like a magic bridge between the two! This is really useful for sharing or copying files fast.
So, a Target Disk Mode Mac enables you to transform your device into an external hard drive, managed by another Mac. Awesome, right? Well, this is particularly handy when the Mac in Target Disk Mode can’t start macOS on its own, but you still need to retrieve some important data from it or make temporary use of its storage space.
Also read: 10 Best Disk Space Analyzers for Mac
How does it work?
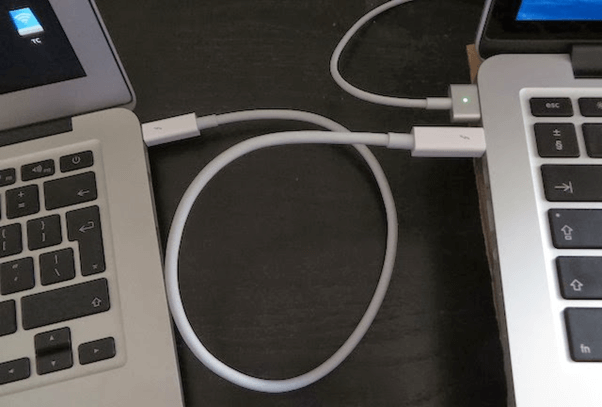
For Target Disk Mode to function, you’ll require two Macs linked by a USB-A, USB-C, or Thunderbolt cable. It’s crucial to ensure that the connecting cable is supported by both Macs. For instance, the 12-inch MacBook from 2015 exclusively supports USB 3.0 or USB 3.1 cables, among others.
With the introduction of new Apple silicon chips, Target Disk Mode has evolved into what is now known as Mac Sharing Mode. Consequently, accessing and working with Mac Sharing Mode varies slightly from Target Disk Mode.
Before engaging Target Disk Mode, it’s important to disable FileVault, which is the default disk encryption, on both computers:
Step 1: Open System Preferences.
Step2: Navigate to Security & Privacy >FileVault.
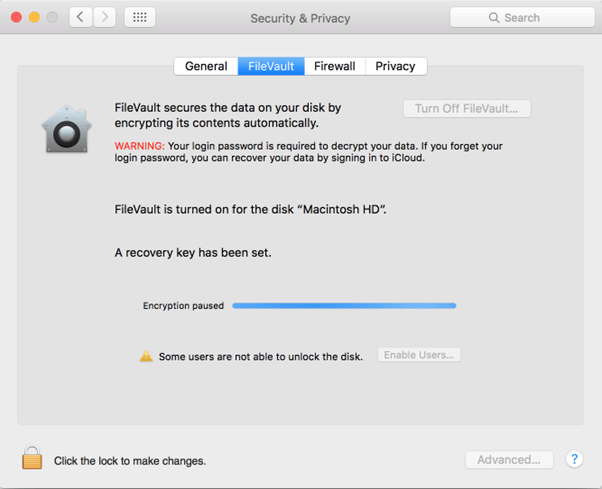
Step 3: Select Turn Off FileVault.
Also read: Best Disk Repair Software For Mac in 2023 [Updated]
How to Use Target Disk Mode on Mac?
So, you’re all set to use Target Mode on Mac? Here’s what you need to do:
Intel-based Macs:
To activate Target Disk Mode on an Intel Mac, follow these steps:
Step 1: Connect two Macs using a cable.
Step2: Restart the Mac you want to use as the target and immediately hold down the T key.
Alternatively, you can enter Target Disk Mode using another method:
Step 1: Open System Preferences. Navigate to Startup Disk.
Step2: Select “Target Disk Mode”
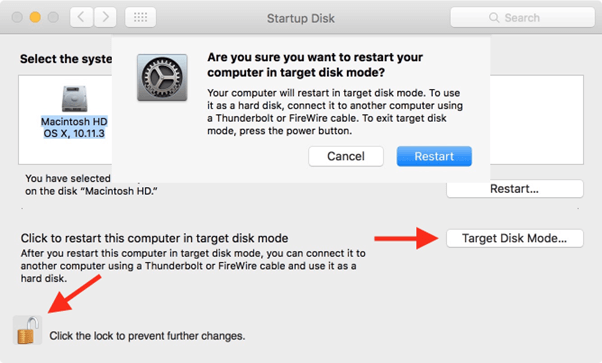
Step 3: Restart your Mac.
To transfer data on Intel Macs using Target Disk Mode, navigate to the Desktop and access the target image of the MacBook Air (or any other target Mac). You can use it to transfer files just like you would with any regular external drive.
Also read: How to Check Storage on Mac | Free up Disk Space on Mac
Silicon-based Macs:
To use Target Disk Mode on a silicon-based Mac, follow these steps:
Step 1: Connect both devices using a cable.
Step2: Power off the Apple silicon Mac using the menu bar.
Step 3: Hold down the power button until the Startup Options appear.
Step4: Initiate a restart in Recovery Mode.
Step 5: Navigate to Utilities > Share Disk. Pick the desired disk and begin sharing.
On Apple silicon Macs, launch Finder and head to the Network section. Locate your target Mac and double-click to access it. Now, you can transfer files back and forth just as you typically would.
How to Exit Target Disk Mode on Mac?
Exiting Target Disk Mode on your Mac is a breeze! Here’s how you do it:
Step 1: Eject the Target Disk: First, make sure you’ve ejected the Target Disk from any Macs currently using it. To do this, simply drag the disk icon to the Trash or right-click and select “Eject.”
Step2: Shutdown or Restart: Once the disk is ejected, you have two options:
- Shut Down: Click on the Apple menu in the top-left corner and select “Shut Down.” Wait for the Mac to completely power down, and then disconnect the cable.
- Restart: Similarly, click on the Apple menu, but this time select “Restart.” When the Mac boots up, it won’t be in Target Disk Mode anymore. You can then safely disconnect the cable.
That’s it! You’re now out of Target Disk Mode and back to regular Mac operation.
Download and Install the CleanUp MySystem App Fine-Tune Your Mac
Ready to supercharge your file transfer game? Before you dive into transferring all those important files from your target Mac, let’s give it a makeover! Say goodbye to the old and useless clutter with the magic touch of the CleanUpMy System App available on the Mac App Store.
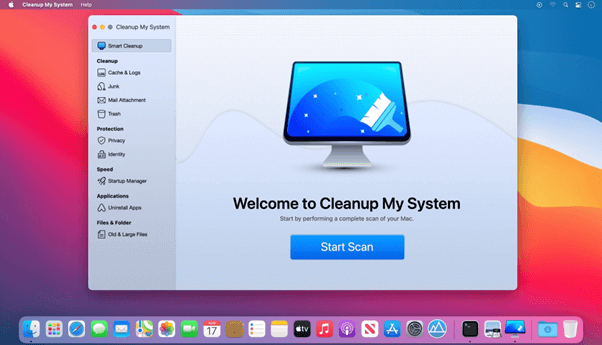
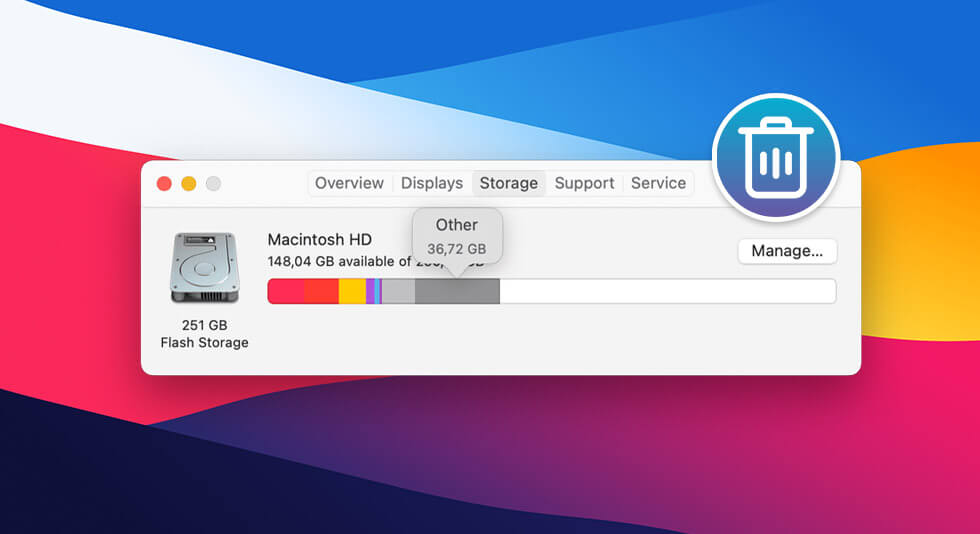
Revamp your Mac experience with a single click! This professional tuneup tool swiftly locates and removes junk files, oversized attachments, and more. Reclaim speed and storage effortlessly!
CleanUp My System offers an intelligently designed “Uninstaller” for efficient application management and completely removes unwanted software. With this feature, you can effortlessly eliminate undesirable apps along with their associated files, leaving no trace behind.
Get Cleanup My System

This powerhouse tool will whip your Mac’s hard drive into shape, ensuring you only move what truly matters. Get ready for a transfer that’s smoother and swifter than ever before!
Also read: How To Fix ‘Your Startup Disk Almost Full’ On Mac OS?
Conclusion
This wraps up our guide on how to use Target Disk Mode Mac. Whether you’re a tech enthusiast or a creative professional, this feature empowers you to harness the full potential of your Mac.
From sharing files seamlessly to troubleshooting issues with ease, Target Disk Mode proves to be a valuable addition to your Mac toolkit.
So, don’t hesitate to explore its capabilities and elevate your Mac experience today.
 How to Delete Other Storage on Mac : Quickly Recover Storage Space
 How to Use System Preferences Setting on Mac and Boost Your Productivity
 Mac Disk Cleanup Guide 101: How To Free Disk Space On Mac?
 Best Disk Partition Software for Mac in 2024