How To Split Screen On Mac

Have you ever found yourself in a situation where you need to keep an eye on multiple applications simultaneously? Or perhaps you’re researching a topic and want to have a web browser open alongside your notes. Yes, there are a handful of situations where you need to access two active windows side by side.
Well, with split-screen functionality on your Mac, you can effortlessly divide your screen into two or more sections, allowing you to work on multiple things side by side. It’s like having a digital space at your fingertips that makes multitasking easier.

In this comprehensive guide, we’ll walk you through the step-by-step process of how to split screen on Mac. Don’t worry if you’re not tech-savvy – we’ll break it down into simple and easy-to-follow instructions. By the end, you’ll be equipped with the skills to navigate through various tasks seamlessly and boost your productivity to new heights.
Let’s get started.
How to Do Split Screen on Mac?
Splitting your screen on macOS Catalina and newer versions is a breeze. With just a few clicks, you can transform your Mac into a multitasking hub. Here’s a step-by-step guide on how to split screen on MacBook:
On macOS Catalina and newer versions:
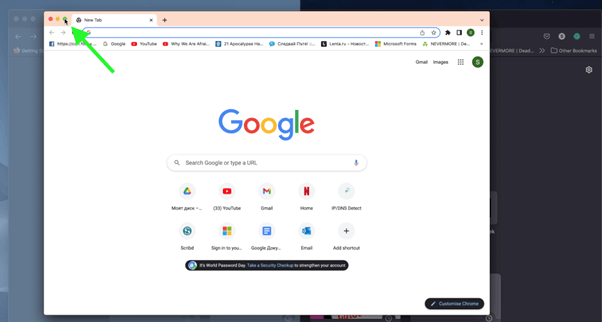
Step 1: To split your screen, position your cursor over the top left corner of the application and hover over the green button responsible for full-screen mode.
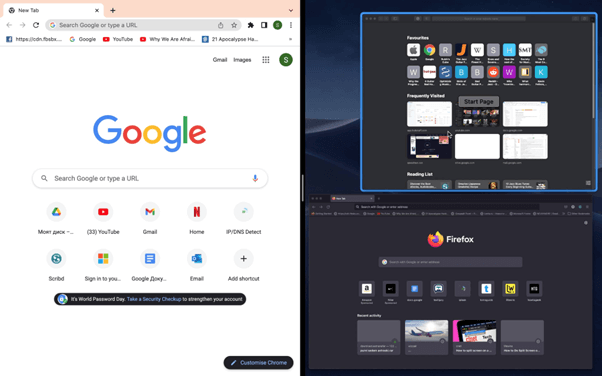
Step2: From the dropdown menu, choose the option to tile the window either to the left or right side of the screen, as per your preference.
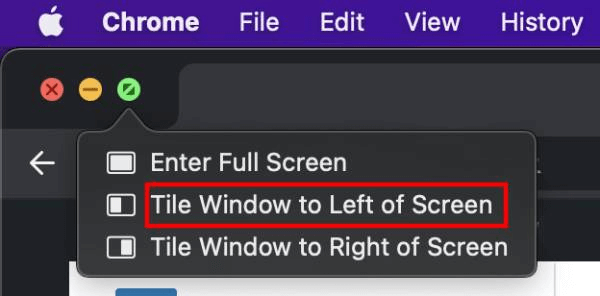
Step 3: This action will place the app in the designated half of the screen, while your other open applications will automatically occupy the remaining space.
Simply select the desired app to lock it beside the first one, and you’re all set to use split view on macOS to multitask like a pro.
On macOS Older Versions (macOS El Capitan, Sierra, High Sierra, or Mojave):
If you’re using an older version of macOS, such as El Capitan, Sierra, High Sierra, or Mojave, the process of using split screen is slightly different. Here’s a step-by-step guide to help you split your screen on these older versions:
Step 1: Open any Application on your MacBook.
Start by opening the applications you want to use in split-screen mode. For example, let’s say you want to have Safari and Pages side by side.
Step 2: Enter Full-Screen Mode
To enter a full-screen mode for an application, click on the green button located at the top-left corner of the window. This will make the application occupy the entire screen.
Step 3: Activate Mission Control
Now, swipe up with three fingers on your trackpad or press the “F3” key on your keyboard to activate Mission Control. This will display all the open windows and spaces on your Mac.
Step 4: Drag One Window to any of the side of your choice.
In Mission Control, you will see all the open windows arranged in a grid-like layout. Click and hold the desired window (e.g., Safari) and drag it towards the right or left edge of the screen. As you do this, you’ll notice that the window expands, creating a space for your other window.
Step 5: Select the Second Window
Next you need to click on the second window from the grid in Mission Control. This will bring it to the front.
Step 6: Place the Second Window
Drag the second window to the opposite side of the screen where the first window is located. As you move it, you’ll notice that the screen adjusts to accommodate the second window.
And that’s it! You can have more than two windows open in split-screen mode by following the same steps and adjusting the size of the windows accordingly. So, give it a try and discover the power of multitasking on your older macOS version.
Also read: Connect With Loved Ones: How To Set up Facetime on Mac
How to Adjust Screen Size in Split View Mode
So, you have just learned how to split screen on Mac, right? To adjust the screen size in Split View mode on macOS, follow these steps:
1. Enter Split View mode by clicking and holding the green full-screen button of an application window.
2. While holding the button, drag the window to either the left or right side of the screen until it occupies half of the display.
3. Release the mouse or trackpad button to anchor the window in place.
4. The other open application windows will appear on the opposite side of the screen.
5. To adjust the screen size, move the cursor to the dividing line between the two windows.
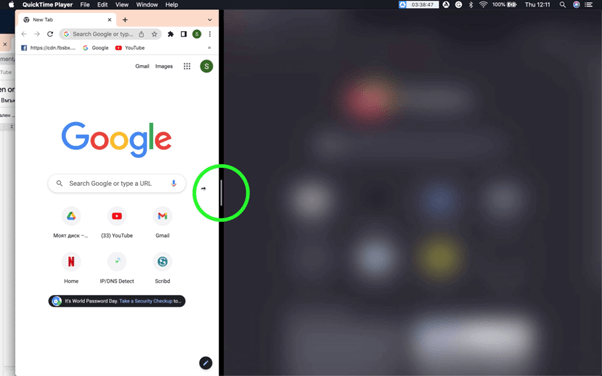
6. When the cursor changes to a double-headed arrow, click and drag the line to the desired position.
7. Slide it towards the center to allocate more space to one application or towards the edges to give the other application more room.
8. Release the mouse or trackpad button to set the new screen size.
By following these steps, you can easily customize the screen size in Split View mode to create the ideal working space for your multitasking needs.
How to Exit Split Screen View on Mac?
When you’re ready to exit Split View mode on your Mac, follow these steps:
1. Move the cursor to the top of the screen to reveal the red, yellow, and green buttons.
2. To close the window of one of the apps in Split View, click the red button.
3. If you want to resize the window, click the green button instead.
4. Don’t worry if the second app disappears; it’s just hidden as a full-screen window. You can easily find it by using the switching options, such as Mission Control or the App Exposé feature.
5. If you wish to swap one of the two apps in Split View, you’ll need to exit Split View mode and repeat the split screen process with the desired app.
Boost Productivity with Mac Multitasking
This wraps up our guide on how to split screen on Mac. Mastering the art of split-screen multitasking on your Mac opens up a whole new world of productivity and efficiency. Whether you’re working on a project, conducting research, or simply juggling multiple tasks, splitting your screen allows you to seamlessly navigate between applications and make the most of your screen real estate.
We’ve covered the step-by-step process for splitting your screen on both macOS Catalina and newer versions, as well as older versions like El Capitan, Sierra, High Sierra, and Mojave. By following the instructions provided above, you can easily divide your screen, position windows side by side, and adjust their sizes to suit your preferences.
Split View mode empowers you to work on multiple applications simultaneously, eliminating the need to constantly switch between windows and enhancing your overall workflow. It’s a game-changer for boosting productivity and staying organized.
Was this post helpful? Feel free to share your thoughts in the comments section.
 How To Reduce Ram Usage on Mac | How to Clear Memory on Mac
 How to Take a Screenshot on Mac Step-By-Step Guide
 How To Fix Macbook Stuck on Loading Screen?
 Best Ways To Stop MacBook Screen Flickering