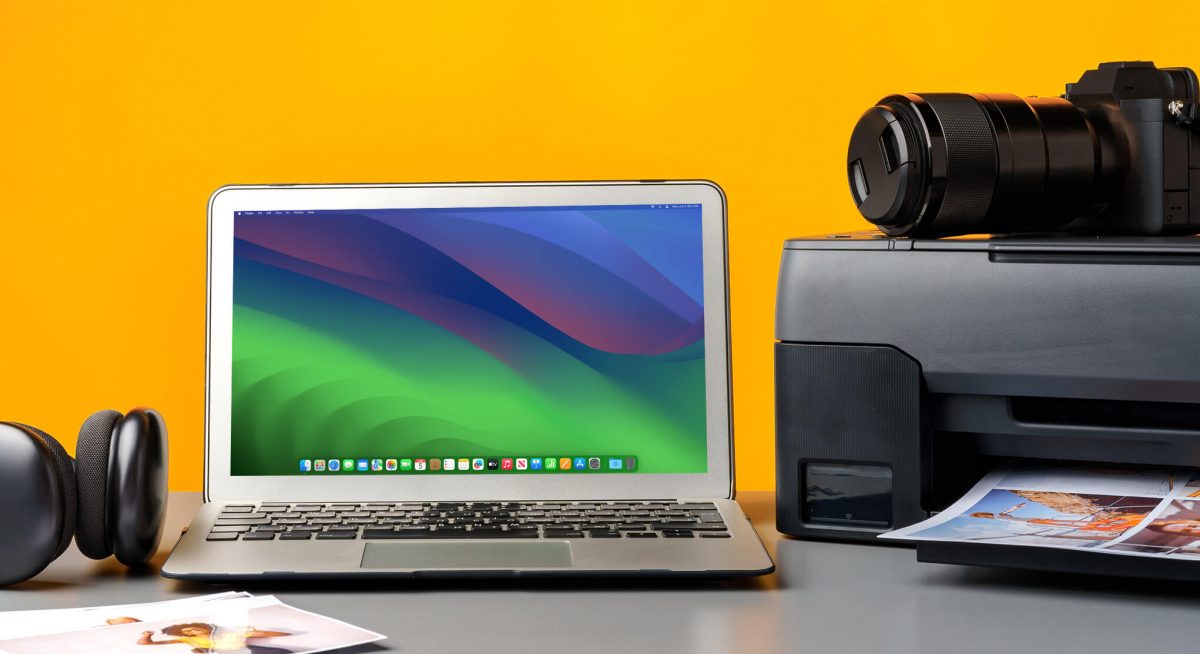
The Best Ways To Add A Printer To A Mac: 4 Easy Methods
Curious about adding a printer to your Mac and asking, “How do I add a printer to my Mac?”. You’ve come to the right place! The process is pretty straightforward that allows you to print documents, photos, and more right from your computer. With a few simple steps, you can connect a printer and start printing in no time.
In this article, we’ll cover the multiple ways to add a printer to a Mac, including connecting wirelessly over Wi-Fi, using a USB cable, adding a shared network printer, and using AirPrint.
Also read: MacOS Sonoma 14.0 Unveiled: New Widgets, Features, Game Mode, Safari Updates, and More!
How to Add Printer on Mac?
You can use any of the below-listed methods to add a printer to your MacBook.
Method 1: Connect Wirelessly Using Wi-Fi
The easiest way to add a printer to your Mac is to connect it wirelessly over Wi-Fi. As long as your printer supports Wi-Fi printing, all you need to do is connect the printer to your wireless network.
Here’s how to connect Macbook to a printer wirelessly:
Step 1: First, make sure your printer is powered on and connected to the same Wi-Fi network as your Mac. Consult your printer’s manual for instructions on connecting to Wi-Fi.
Step 2: Open System Preferences on your Mac and click “Printers & Scanners”. Click the + button to add a printer.
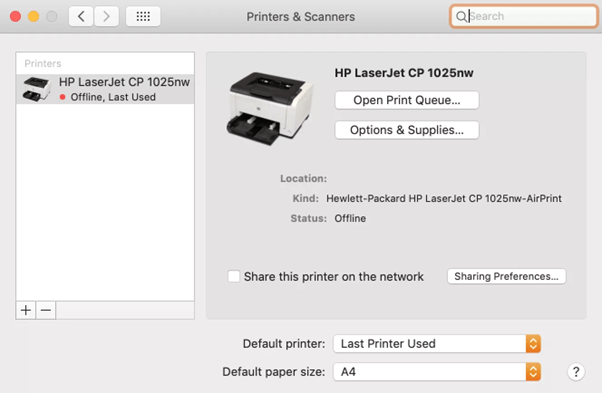
Step 3: Select your printer from the list of discovered network printers. If you don’t see your printer, click “Add Printer or Scanner” and select your printer’s name and model.
Step 4: Your Mac will automatically install any required software drivers. Click “Add” when prompted.
Your printer will now be successfully installed and ready to print from your Mac! Test it out by printing a test page.
Connecting wirelessly over Wi-Fi is convenient since you don’t have to connect any cables to your Mac. As long as your printer stays connected to the network, you can print from anywhere in your home.
Also read: How to Reduce PDF File Size on Mac
Method 2: Use a USB Cable
If your printer does not support Wi-Fi, you can add it to your Mac using a USB cable.
Here’s how to add printer on Mac using a USB cable.
Step 1: First, turn on your printer and connect it to your Mac using a USB cable.
Step 2: Open System Preferences > Printers & Scanners. Click the + button to add a printer.
Step 3: Select your printer from the list. If you don’t see it, select “Add Printer or Scanner” and choose your model.
Step 4: Click “Add” to install any required software drivers. Your printer will now appear in the list of printers and be ready to print from your Mac.
The benefit of using a USB cable is that it allows you to connect older printers that may not have wireless capabilities. Just make sure your printer is compatible with Mac OS before connecting it. USB also provides faster printing speeds compared to Wi-Fi.
Method 3: Add a Shared Network Printer
If you want to share a printer on your local network with other Mac and Windows users, you can add a shared network printer. This allows anyone on the same network to print to the same printer without the need to connect directly to it.
Follow these steps to add a shared network printer:
Before proceeding, ensure that the printer you want to add is shared on the network. The printer should be connected and set up on another computer within the same network, and printer sharing should be enabled on that computer.
Step 1: You’ll need the IP address or network name of the shared printer. To find the IP address, you might need to access the printer settings on the computer it’s connected to or check the printer’s manual.
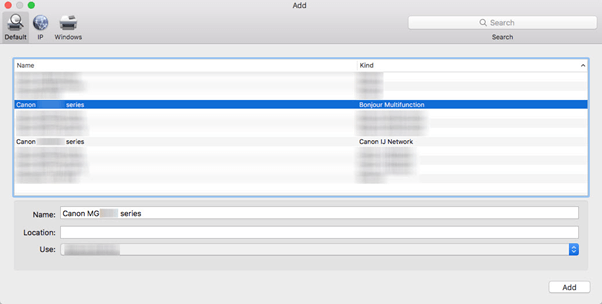
Step 2: Go to System Preferences on your Mac. Click on “Printers & Scanners.” Click the ‘+’ button at the bottom left to add a new printer.
Step 3: Switch to the “IP” tab. Enter the printer’s IP address in the “Address” field. Select the printer’s make and model from the “Use” dropdown menu or click “Select Software” to choose the appropriate driver if it’s not auto-detected. Click “Add” to add the printer.

Try printing a test page or document to ensure the printer is set up correctly.
Your Mac will install the required drivers and your printer will show up as available. You can also manage the sharing settings from your Mac. Any time the printer is powered on and connected to the network, you and other users can print to it.
A shared network printer is ideal for offices, households with multiple devices, and other scenarios where you want to access the same printer from different computers.
Also read: How To Sign A PDF on Mac Quickly
Method 4: Print Using AirPrint
If you have an AirPrint-compatible printer, you can wirelessly print from your Mac without installing any software drivers.
Here’s how to add printer on Mac using AirPrint:
Before you proceed, ensure that your printer is AirPrint compatible. Most modern printers support AirPrint, but it’s good to verify this.
Step 1: Make sure your AirPrint printer is connected to the same Wi-Fi network as your Mac.
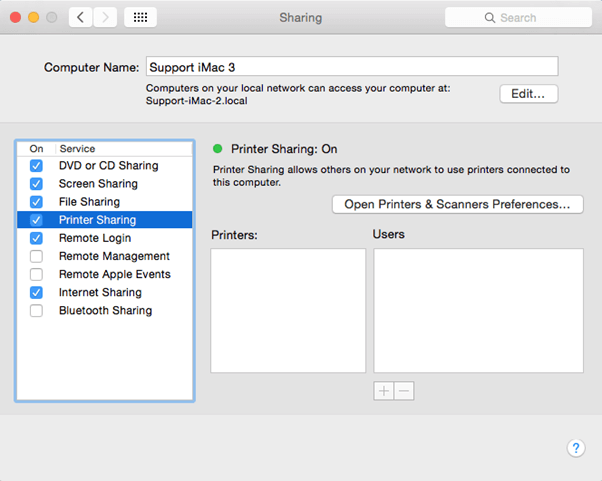
Step 2: Go to System Preferences > Sharing on your Mac. Check the box next to “Printer Sharing” on the left-hand side. Select the printer you want to share from the list.
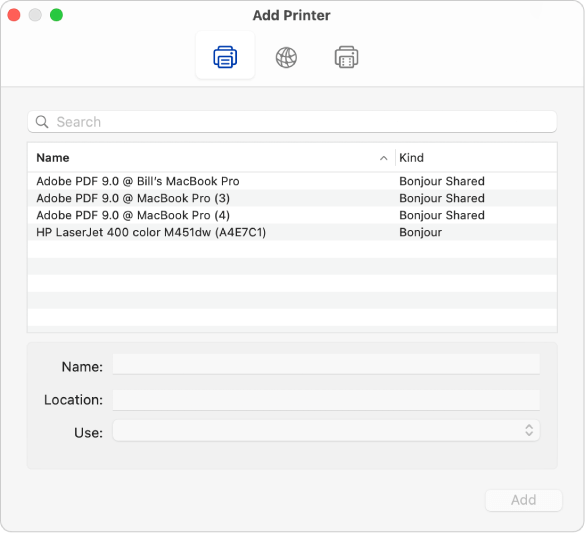
Step 3: After enabling printer sharing, go to System Preferences. Click on “Printers & Scanners.” Click the ‘+’ button at the bottom left to add a new printer. Your Mac should automatically detect the printer on the network. Select it from the list.
Step 4: Your Mac will automatically add the printer.
With AirPrint set up, you can print directly from various apps on your Mac without the need to open the Printers & Scanners preferences each time. AirPrint also seamlessly integrates with Apple devices like iPhones and iPads as well. Just make sure your printer supports AirPrint before trying to connect.
Tips for Adding a Printer to Your Mac
Here are some additional tips to help you successfully add a printer to your Mac:
- Check printer compatibility before buying a new printer to ensure it will work with your Mac and macOS versions. Look for a printer with Mac drivers available from the manufacturer.
- When connecting over Wi-Fi, position your printer close to your Mac or router for the best connection. Keep it away from potential interference sources.
- Update your Mac to the latest version of macOS to ensure full compatibility with printers.
- When using a USB printer, try different USB ports if you have issues. Avoid connecting through a USB hub.
- If your printer requires a wired and wireless setup, connect it using USB first to install the drivers before switching to Wi-Fi.
- If your printer won’t print, check for error messages and troubleshoot any issues. Reinstalling the drivers often helps.
Adding a printer to your Mac is a quick process that gives you access to printing documents, photos, invitations, and more right from your computer. Whether your printer connects wirelessly over Wi-Fi or by USB cable, following the steps outlined will have you printing in no time.
Check for driver updates occasionally to keep your printer working its best with your Mac.
Also read: How to Use System Preferences Setting on Mac and Boost Your Productivity
Conclusion
In conclusion, adding a printer to a Mac offers numerous convenient options tailored to different preferences and technological capabilities. Whether through straightforward system preferences, AirPrint compatibility for wireless setups, or the use of third-party software for more extensive functionalities, Mac users have a range of choices to seamlessly integrate their printers.
FAQs:
Q1: How do I add a printer to my Mac?
The easiest way to add a printer to your Mac is to open System Preferences > Printers & Scanners, click the + button, and select your printer from the list of discovered printers. Your Mac will install any required drivers automatically. You can also add printers by connecting via a USB cable or setting up a shared network printer.
Q2: How can I connect my MacBook to a printer wirelessly?
To connect your MacBook to a printer wirelessly, make sure both your Mac and printer are connected to the same Wi-Fi network. Open System Preferences > Printers & Scanners, click +, and select your wireless printer from the list. As long as your printer stays connected to the network, you’ll be able to print wirelessly.
Q3: What should I do if my Mac doesn’t automatically find my printer?
If your Mac isn’t automatically detecting your printer, try manually adding it by clicking “Add Printer or Scanner” in the Printers & Scanners preferences. Here you can select the model and enter details to help your Mac locate and install the required software drivers.
Q4: Why isn’t my wireless printer showing up on my Mac?
If your wireless printer isn’t showing up on your Mac, make sure it is powered on and connected to the same Wi-Fi network as your computer. You may also need to reposition the printer closer to your router for a stronger signal. Check for firmware updates for your printer as well.