How To Delete Spotify Cache: Optimize Your Streaming Experience

Looking to streamline your Spotify experience on your Mac? The cache can sometimes become a digital clutter, leading to a slow down or causing unexpected glitches. In this comprehensive guide, we’ll walk you through the step-by-step process of clearing your Spotify cache on a Mac, ensuring smoother playback, faster loading times, and an overall optimized music streaming experience.
Whether you’re a tech novice or a seasoned Mac user, this guide will simplify the process, helping you reclaim space and keep your Spotify running seamlessly.
Let’s dive in and clear the path to a cleaner, faster Spotify on MacBook experience!
Also read: 10 Best Music Players for Mac Users
What is Spotify Cache?

Spotify cache refers to temporary files stored on your device while using the Spotify app. These files contain snippets of music, album artwork, playlists, and other data that help the app load content faster when you revisit songs or albums. Essentially, it’s a storage mechanism to speed up the playback experience by storing frequently accessed information locally on your device.
However, over time, this cache can accumulate and occupy a significant amount of space, potentially causing the app to slow down or performance issues. Clearing the Spotify cache helps free up storage space and resolve glitches or playback problems, ensuring a smoother music streaming experience.
Also read: How To Delete Cache On a Mac
How to Clear Spotify Cache on Mac: A Step-by-Step Guide!
Like many apps, Spotify utilizes a cache system to temporarily store data, enabling faster access than downloading it anew from the Internet. However, this cache builds up over time and can start to consume significant storage space and slow things down.
To delete it, you first need to find where Spotify keeps its cache files on a Mac. Here are the steps to clear Spotify cache on a Mac:
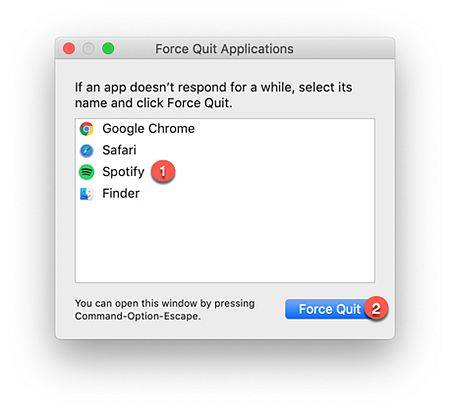
Quit Spotify: Ensure that Spotify is completely closed before you proceed. Go to the Spotify app, click on “Spotify” in the menu bar, and select “Quit Spotify.”
Open Finder: From the top menu, click on “Go” and select “Go to Folder” (or use the shortcut Command + Shift + G).
Locate Spotify Cache Folder: In the dialogue box, type in the following:
“~/Library/Application Support/Spotify/PersistentCache/Storage” and press Enter. This will take you directly to the Spotify cache folder.
Delete Cache Files: Once you’re in the Spotify cache folder, select all the files and folders within it. You can either press Command + A to select all or manually select them.
Move to Trash: After selecting the cache files, drag them to the Trash bin or right-click and select the “Move to Trash ” button to delete cache files associated with the Spotify app.
Empty Trash: To completely remove the cached files, right-click on the Trash icon in the Dock and choose “Empty Trash.” Confirm the action when prompted.
Restart Spotify: Open Spotify again, and it will start afresh, recreating the necessary cache files as you use the app.
Be sure Spotify is not running when you do this, or it may recreate cache files while you delete them. After emptying the cache, launch Spotify – it will rebuild the necessary cache data on the fly.
If locating the folder seems challenging, here’s an alternative method to pinpoint the exact location of Spotify’s cache:
Alternative Way To Find & Remove Spotify Caches On Mac
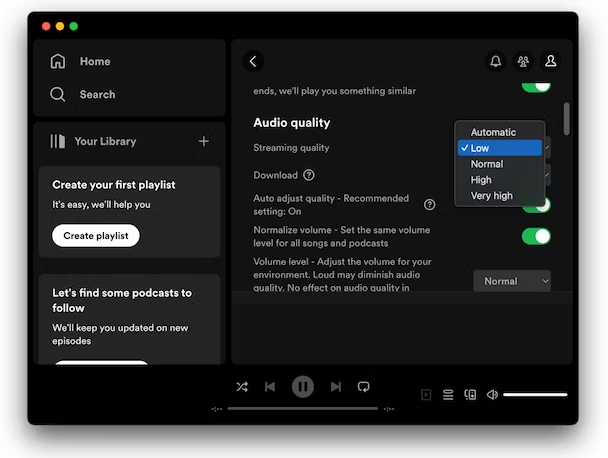
Step 1: Launch Spotify and access the Spotify menu.
Step 2: Choose “Settings” from the menu options.
Step 3: Navigate to the “Offline storage location” section.
Step 4: Identify the specific folder where Spotify stores its cache.
Step 5: Access that folder directly and clear its contents to remove the cache effectively.
Also read: How to Clear Safari’s Cache and Cookies on Mac
Advanced Cache Clearing Options
If you want to automate the process of cleaning Spotify’s cache to save effort, consider these options:
- Use a Mac cleaner app like CleanUp My System to scan and empty the cache from multiple apps with one click.
- Enable Mac’s built-in Storage Management facility under System Preferences > Apple ID to regularly clear cached files for all apps when storage space is low.
- Adjust Spotify’s cache size limit under Preferences > Files. A lower limit prevents excessive cache buildup between deletions.
What Gets Deleted When Clearing Cache?
Deleting the Spotify Cache folder only removes temporary app data. Your playlists, favorites, settings, downloaded songs, and other music are stored elsewhere and will not be affected.
Specifically, clearing cache deletes:
- Track metadata and previews used to quickly browse Spotify’s catalog.
- Album art, artist images, and other media files.
- App update data and logs.
- Chunks of songs are buffered for smooth streaming.
- Listening recommendations and other serialized data.
- Web page elements, ad content, and other network data.
You may need to re-enter your username and password after deleting the cache. Playlists and stations will need to re-populate as you use the app. But your Spotify account details, preferences, and library remain intact.
Also read: 10 Best Audio Converters For Mac
Why You Should Clear Cache Regularly?
Deleting Spotify’s cache provides several performance and maintenance benefits:
- Frees up storage space consumed by unneeded junk files.
- Fixes app crashes, slowdowns, and other glitches.
- Provides a fresh start, improving overall speed.
- Avoids runaway cache buildup by forcing recreation.
- Can resolve issues with corrupted cache data.
- Removes tracking elements and discarded app artifacts.
- Prevents obsolete cached data from conflicting with updates.
For best app performance, periodically clearing the Spotify cache should be part of your regular Mac maintenance routine. Follow the steps outlined in this guide to delete the cache on your Mac and keep Spotify rocking smoothly.
Conclusion | Maximize Your Spotify Experience: The Importance of Clearing Cache
As we conclude this guide to clear Spotify cache on a Mac, you’ve empowered yourself with the knowledge to keep your music streaming experience at its best. By regularly clearing the cache, you ensure smoother playback, faster loading times, and a more optimized Spotify application. Embracing these simple steps not only enhances your enjoyment but also helps keep your Mac running efficiently.
So, as you continue to explore the vast world of music on Spotify, remember these easy techniques to maintain a seamless and enjoyable listening experience on your Mac.
Cheers to a clutter-free and optimized Spotify journey!
 How to Uninstall McAfee on Your Mac: Step-by-Step Uninstallation Guide!
 How to Clean an SD Card on Mac Without Formatting
 How To Delete Cache On a Mac
 How to Clear Safari’s Cache and Cookies on Mac