How to Format USB on Mac – Optimizing Your USB Storage
In today’s digital world, knowing how to manage your storage devices efficiently is a valuable skill. Isn’t it? Whether you’re handling substantial media files or simply striving to maintain a well-organized digital life, learning how to format a USB drive on your Mac can significantly enhance your ability to manage data and storage effectively.

Formatting might sound a complex process, but fear not! This guide will walk you through the process to format USB on Mac, providing easy-to-follow steps to set up your USB drive exactly the way you want it. From choosing the right file system to safeguarding your data, we’ve got you covered.
Let’s get started and make sure your Mac’s storage capabilities are working for you!
Also Read: How to Recover Data from External Hard Drive on Mac?
Why Format a USB on Mac?
Formatting a USB drive on your Mac is a crucial step in ensuring its compatibility and efficiency. It allows you to prepare the drive to work seamlessly with your macOS ,optimizing performance and enabling it to store and retrieve data effectively.
Additionally, formatting can help resolve issues related to file system errors, making the USB drive more reliable in the long run. Whether you’re preparing the drive for a specific task or looking to erase previous data securely, understanding how to format a USB on Mac is an essential skill for any user.
Also Read: How To Transfer Videos From iPhone To Your Mac: 5 Simple Ways
How to Format a USB for Mac: A Step-by-Step Guide!
The process of formatting a drive only takes a few minutes. macOS includes a built-in tool called Disk Utility that allows you to easily format any drive.
Formatting a USB drive for your Mac is simple with just a few steps:
Step 1: Insert the USB Drive into Your Mac
To format USB on Mac, first, insert the USB drive you want to format into your Mac computer using an available USB port. Make sure the drive is properly inserted before moving forward.
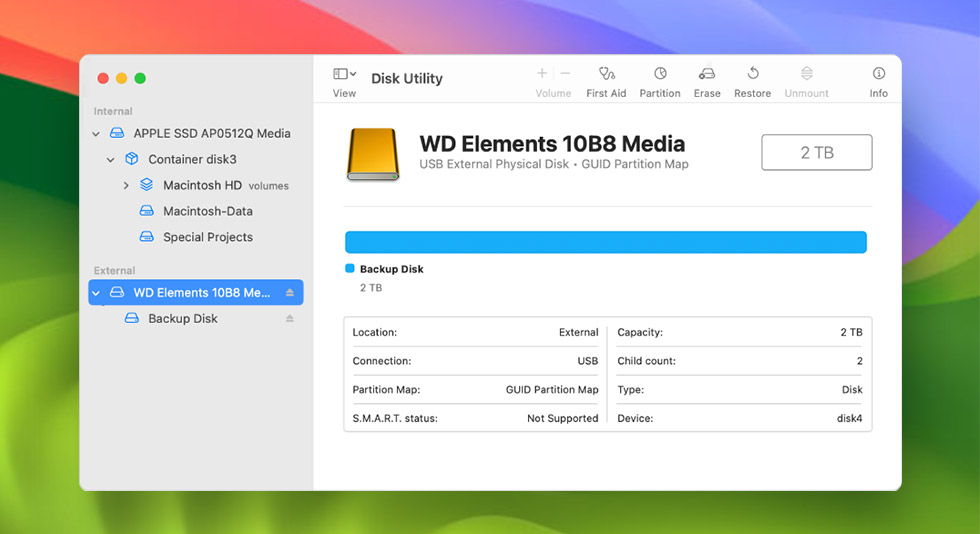
Step 2: Open Disk Utility
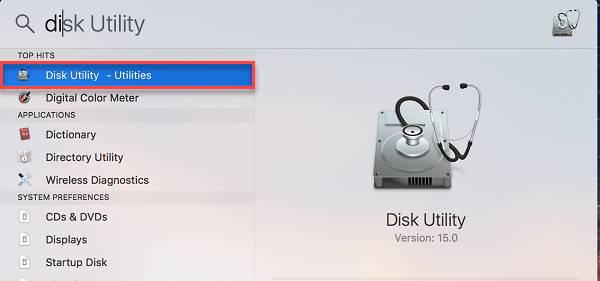
Next, open the Disk Utility app on your Mac. The quickest way is to use Spotlight Search. Click the magnifying glass icon in the top right corner of your screen and search for “Disk Utility”. Then select the Disk Utility app to open it.
Step 3: Select USB Drive
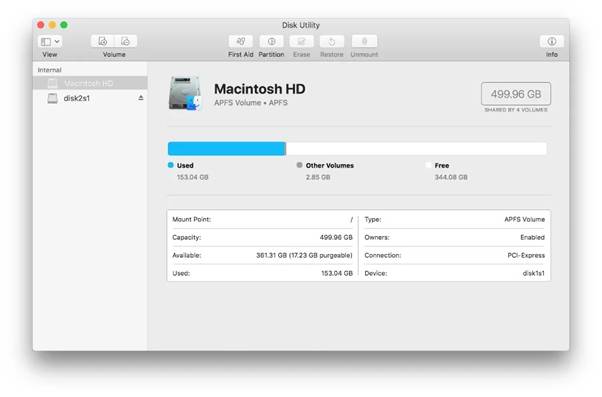
In Disk Utility, you will see a list of available drives in the sidebar on the left. Locate the USB drive you want to format and select it. This is the drive that will be formatted.
Step 4: Click “Erase”
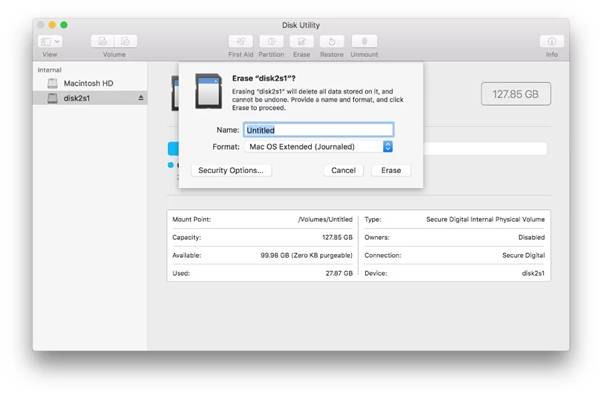
Here comes the most crucial step in the process of how to format USB drive on Mac. With the USB drive selected, click the “Erase” button along the top of the Disk Utility window. This will bring up the formatting options.
Step 5: Choose “Mac OS Extended (Journaled)”
A pop-up will appear with formatting options. Choose “Mac OS Extended (Journaled)” from the “Format” dropdown menu.
This will format the drive for macOS. mac OS Extended, designed exclusively for Mac users, boasts the highest maximum file size among the available options. But yes, opt for this format only if the drive will exclusively operate within the Mac OS environment.
Also Read: 7 Quick Solutions To Fix Macbook Screen Goes Black But Still Running
Step 6: Rename (optional)
If you want, you can rename the USB drive in the pop-up window. Otherwise, leave the default name as is.
Step 7: Click “Erase”
Finally, click the “Erase” button at the bottom of the pop-up window. This will start the formatting process.
Step 8: Wait for Formatting to Finish
Disk Utility will now erase and format the USB drive. Wait for this process to fully complete.
Step 9: Eject and Use USB Drive
Once done, click “Done”, eject the USB drive properly, and it’s ready to use!
Thanks to the built-in Disk Utility app, formatting a USB drive on a Mac is a very simple process that can be done in just a few clicks. Following the steps above allows you to properly format the drive to be fully compatible with your Mac.
With a newly formatted USB drive, you’ll be able to securely store files and have peace of mind knowing the drive is optimized for your Mac.
Also Read: How to Use Target Disk Mode on Mac: Enjoy Quick File Transfers
Tips to Consider While Formatting a USB Drive on Mac

Preparing to format your USB on a Mac? Here are some essential tips to keep in mind before you begin your journey of how to clean a flash drive on a Mac.
- Backup Your Data: Always ensure you’ve backed up any important files before formatting.
- Choose the Right Format: Select the file system that suits your needs, considering compatibility with other devices.
- Avoid Interruptions: Make sure your Mac and USB drive has a stable power source to prevent any disruptions during formatting.
- Double-check the Drive: Confirm you’ve selected the correct USB drive to avoid accidental data loss.
Formatting a USB drive on your Mac is a straightforward process, but keeping these tips in mind will help ensure a smooth experience.
Also Read: How To Use iMac as Monitor
Conclusion | Formatting USB Drives on Mac Made Easy
In conclusion, mastering the art to format USB on Mac is a fundamental skill that can significantly enhance your digital life. By following the straightforward steps outlined in this guide, you’ve learned how to tailor your USB drive to your specific needs, optimizing its compatibility and efficiency.
This skill will help you customize your storage needs and keep things running smoothly. Just remember to back up any important files before you start! With this knowledge, you’re all set to make the most out of your Mac and USB drives.
Happy formatting!
 Streamlining Your Mac’s Storage: How to Delete Partition on Mac
 How to Increase Download Speed on Mac
 How to Recover Data from External Hard Drive on Mac?
 Top 9 MacBooster Alternatives For Optimizing Your Mac