Best Ways To Organize Photos on Mac : Streamline Your Mac’s Photo Library
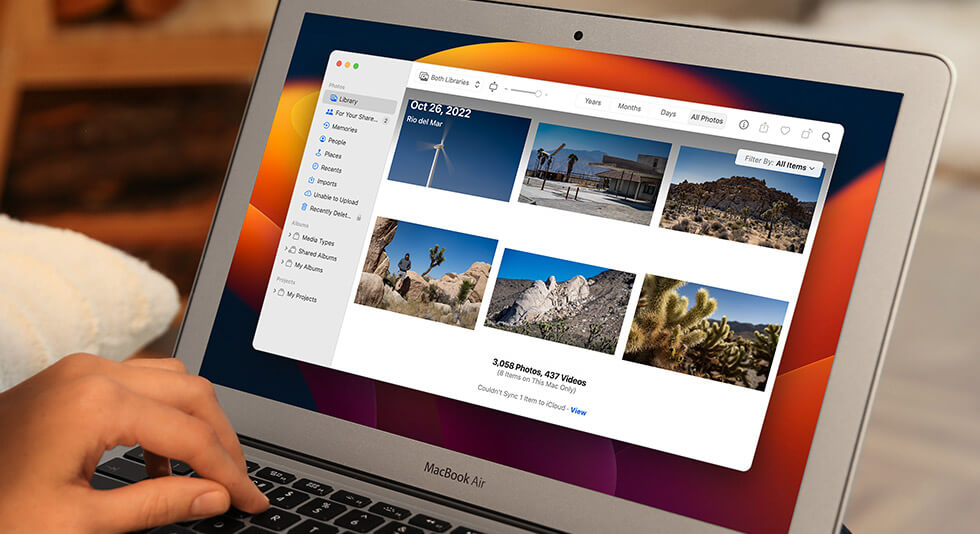
Capturing special moments through photographs has become an integral part of our lives. From picturesque landscapes to joyful family gatherings, our photo libraries are filled with precious memories. However, with the exponential growth of digital photography, it’s easy for our Macs to become a chaotic jumble of disorganized images.
Are you tired of scrolling through an endless sea of files in search of that one perfect picture? Well, fret no more! In this blog post, we will explore the best ways to organize photos on Mac, ensuring that every memory is effortlessly accessible and beautifully arranged.

Whether you’re a professional photographer, a casual snapper, or just someone who loves to capture life’s moments, these tried-and-true methods will transform your photo collection into a well-organized, easily navigable treasure trove.
Let’s dive in and discover the best way to organize photos on Mac like a pro!
How to Organize Photos on Mac
Organizing photos on your Mac can be a daunting task, but it’s worth the effort to keep your digital collection tidy and easily accessible. Here are some of the best methods to try to keep your Mac organized.
Method 1: Say Goodbye to Duplicate Files
One of the first steps in organizing your photos is getting rid of duplicate files. Here’s how you can do it:
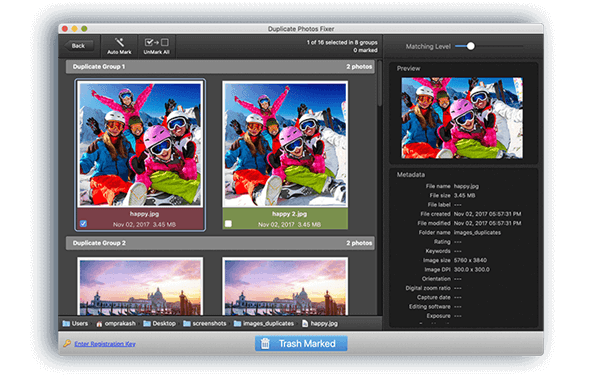
Take advantage of dedicated duplicate file finder apps: There are plenty of third-party applications out there designed specifically to help you find and remove duplicate photos from your Mac. Some popular options include Gemini and Duplicate Photos Fixer. These handy tools scan your entire photo library and identify duplicate files based on criteria like file names, sizes, and even content. They make it much easier to locate and delete duplicates efficiently.
![]()
Download Duplicate Photo Fixer Pro

Try manual searching: If you prefer a more hands-on approach and don’t want to rely on additional software, you can manually search for duplicate files on your Mac. Open the Finder and navigate to your Photos folder or any other location where you store your photos. Take a close look at files with similar names, sizes, or even content. You can sort the files by name, size, or date modified to make the process smoother. When you find duplicate copies, go ahead and delete the extras.
Also read: How To Find and Delete Duplicate Photos On Mac
Method 2: Leverage the power of the Photos app
If you’re already using the built-in Photos app on your Mac, you’ll be pleased to know that it offers some features to help you manage duplicate photos. Open the Photos app and head to the “Photos” tab. From there, click on the menu bar and select “View” followed by “Show Duplicate Items.” This will filter your photo library and you will be able to delete duplicate files effortlessly.
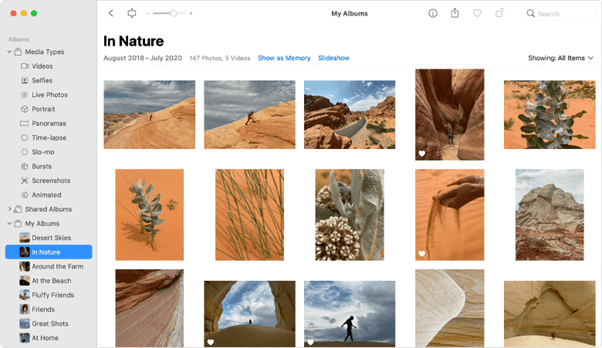
Method 3: Create Albums
Creating albums is a great way to organize photos on Mac. It allows you to group related photos together and quickly find them whenever you need to. Here’s how you can create your albums:
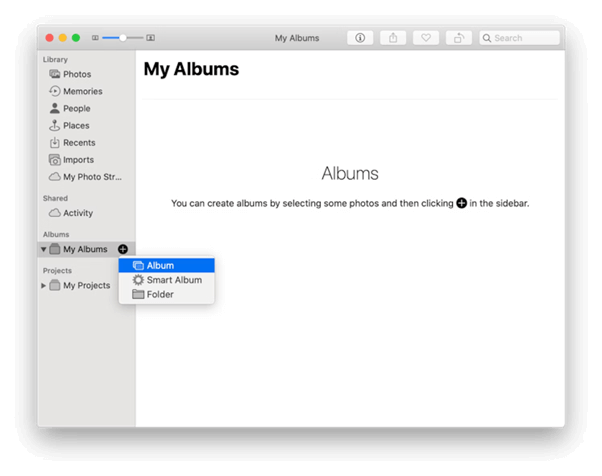
The conventional method involves creating a basic “album” in Photos by selecting the plus icon adjacent to the “Albums” section, then choosing it from the provided options.
Once the album is created you can manually add images to it to streamline your photo library.
Also read: How To Transfer Photos From iPhone to Mac
Method 4: Group Photos in a “Smart Album”
Here are the steps on how to group photos on Mac by creating a “Smart Album”:
Step 1: Open the Photos app on your Mac. Click on the File menu and select New Smart Album.
Step 2: In the New Smart Album dialog, you can choose the criteria for the Smart Album. You can set one condition or many.
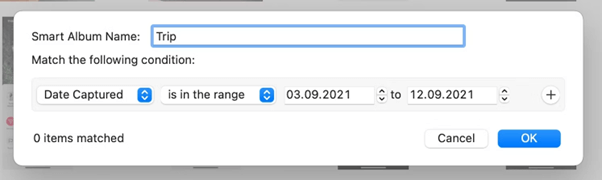
Step 3: Enter the values suiting your needs and preferences. Once you have chosen the criteria for the Smart Album, click on the OK button.
Your new Smart Album will appear in the Albums sidebar.
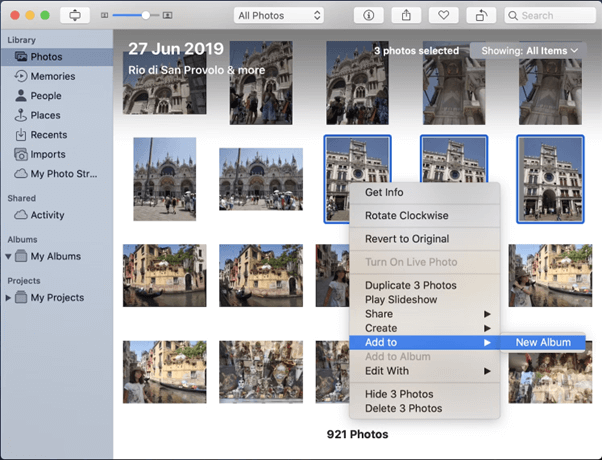
Method 5: Add Photos to Existing Album
There are three ways to add photos to an existing album on your Mac:
- Drag and drop: Select the photos you want to add, then drag them to the album icon in the sidebar.
- Shift or Command-select: To select multiple photos, hold down the Shift or Command key while clicking on the photos. Then, drag the selected photos to the album icon.
- Right-click: Right-click on a photo or group of photos, then select Add to from the menu that appears. Select the album you want to add the photos to.
Also read: How To Fix “Photoshop Scratch Disk Full Mac” On Mac
Method 6: Use Shared Albums
Here comes another handy method to organize photos on Mac. Shared Albums is a feature in the Photos app on your Mac that allows you to create albums of photos and videos and easily invite others to view them.
To create a shared album on Mac, you need to:
Step 1: Open the Photos app.
Step 2: Take the mouse pointer over Shared Albums and click on the plus (+) button.
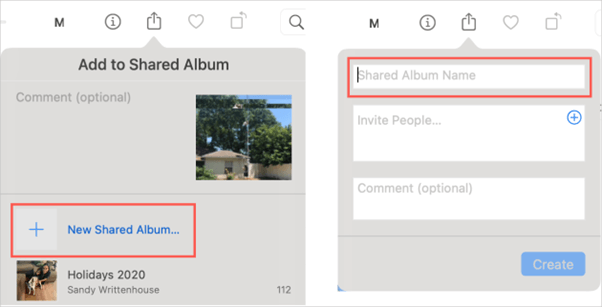
Step 3: Type desired name for this shared album.
Step 4: In the textbox for Invite People, type the email address of the people you wish to share the album. You may also click on the plus button (+) and choose a contact from your iCloud.
Step 5: Finally, click on Create.
Shared Albums can help you organize photos on your Mac. You can create albums of photos and videos and easily invite others to view them. The people you invite can view your album from any Mac, PC, iPhone, or iPad.
Method 7: Use a Professional Photo Organizer App
Yes, there are professional photo managers for Mac that can help you organize photos on your Mac.
Utilizing a professional photo organizer app on your Mac can be a game-changer when it comes to efficiently organizing and managing your vast collection of photos. These dedicated apps offer a range of powerful features and functionalities designed specifically to streamline the organization process.
By employing a photo organizer app, you can take advantage of advanced tools such as automated sorting, facial recognition, and intelligent tagging. These features help you categorize your photos effortlessly, saving you countless hours of manual organization. Additionally, many apps provide robust search capabilities, allowing you to quickly locate specific images based on various criteria like date, location, or even specific objects within the photos.
Adobe Lightroom is one of the best photo organizers for Mac which is cloud-based, based on machine learning, and has a complete photo management suite with various powerful editing tools. It can be a little overwhelming and not always intuitive for beginners, but it has a catalog system that can handle any photographer’s archives.
Another option is Apple Photos, which is a simple solution to sort and manage photos on Mac, with personalized albums, facial recognition, GPS, and some basic photo editing features.
Also read: Best Photoshop Alternatives for Mac 2023
Wrapping Up…
Organizing your photos on a Mac can truly transform your digital experience, making it a breeze to rediscover and relive your treasured moments. The tips and techniques shared in this blog offer practical and effective ways to bring order to your ever-growing photo library.
A well-organized photo library isn’t just about saving time and avoiding frustration; it’s about the joy of immersing yourself in memories, of seamlessly sharing your experiences with loved ones. So, embrace these techniques, infuse your digital world with organization, and watch as your photo collection becomes a captivating tapestry of life’s precious moments.
Was this post helpful? Feel free to share your thoughts in the comments section.
 10 Best Image Viewer Apps for Mac 2024
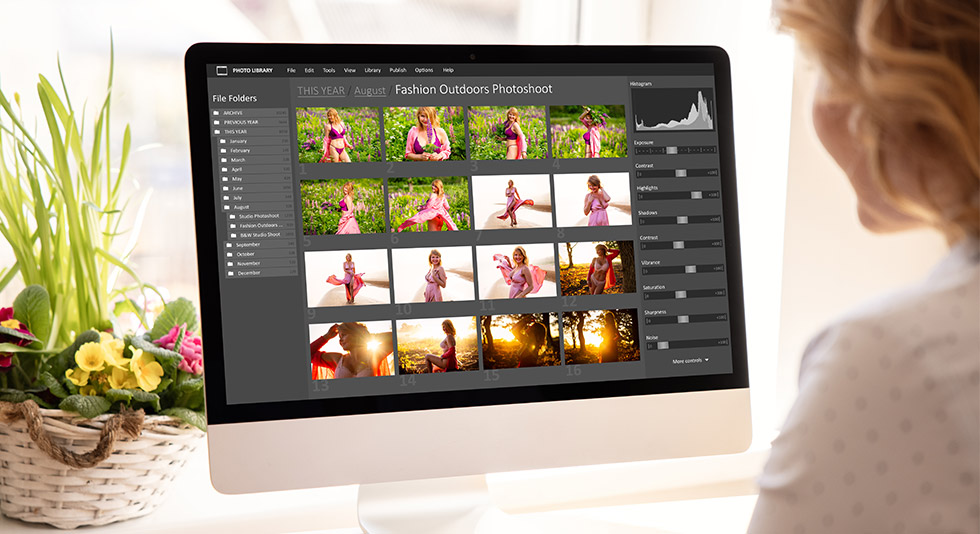 How To Find and Delete Duplicate Photos On Mac
 Photos Exif Editor: Best Tool To Change EXIF Data Of Captured Images